66 Ford F100 Crown Vic swap "Project SixtySick"

Koomz

Member
Hey all I just thought Id share my build along side of all these other inspirational builds going on. Im not a crazy fabber nor do I have thousands in shop tools. Im just your average handyman some of you may cringe at my techniques and Im ok with that lol. I urge your constructive criticism and look forward to this adventure.

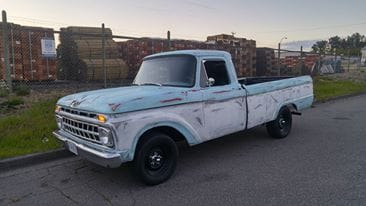
I picked up a 1966 ford f100 with a 69 t-bird 429 thunderjet and c-6 in it.
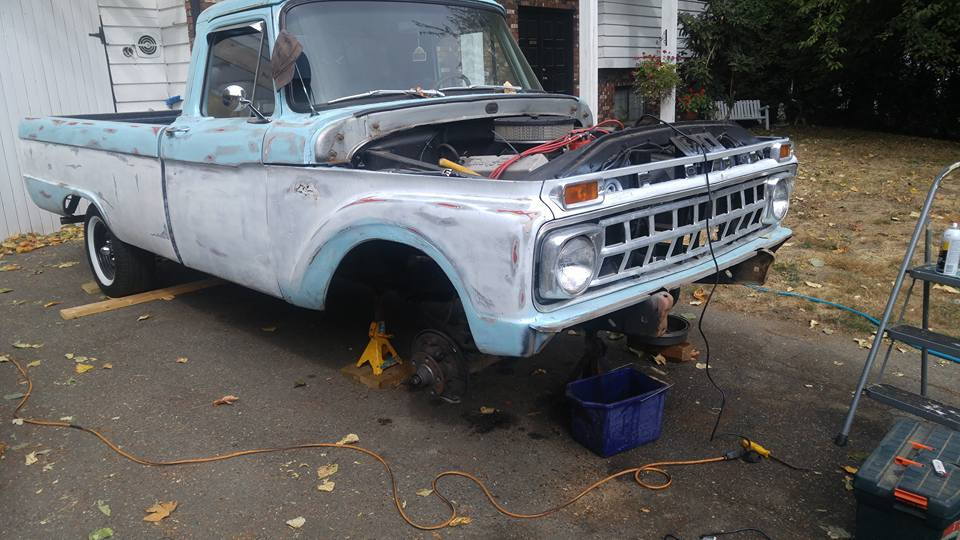
I daily drove it like this on manual drums and steering until I tore the studs clean through the hub assembly ...all 5. scary!

So here it is 08 crown vic p71 font subframe swap.. for some maybe not the cheapest and most effective way but for me to get lowered , pwr steering, and brakes I can work with ford ..I know and am comfortable with ford ..jag and whatever else truly kinda scares me.

on to the build.

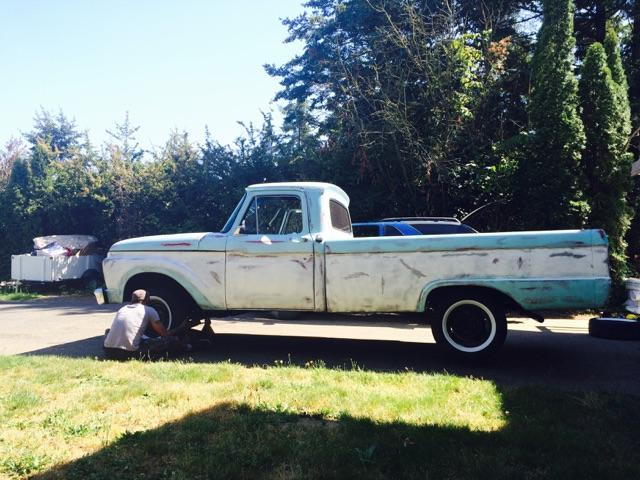
this is when I was driving it as it was before the breakdown


80-bought_0c88285190c3396ca95eb95b50d814203052361e.jpg


on the road!

80-stock_c102e2541deecf58d541cdf844652fd9cff5e994.jpg


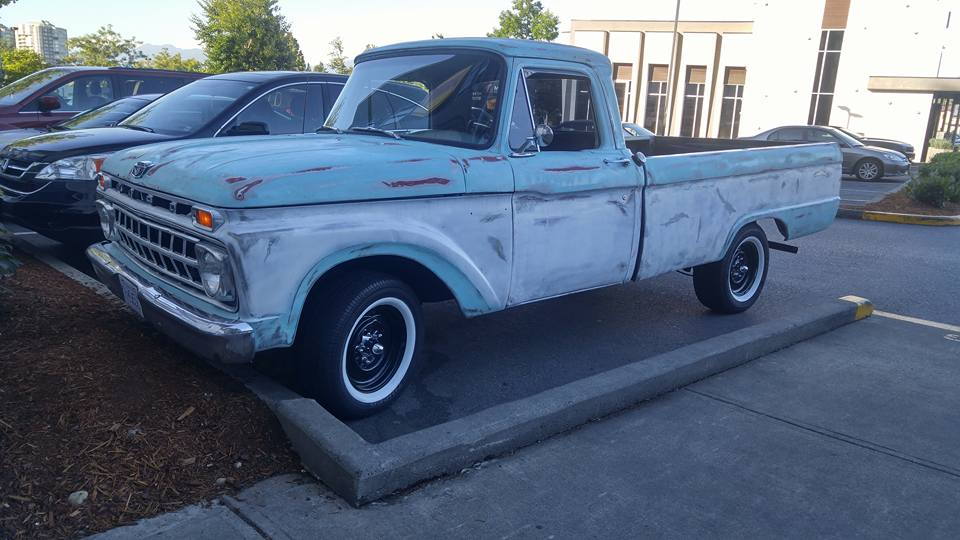
heres when I added some white wall inserts

80-429_thunderjet_98b7a24b4f5778b6ee91de9db16c9b3c99501d09.jpg


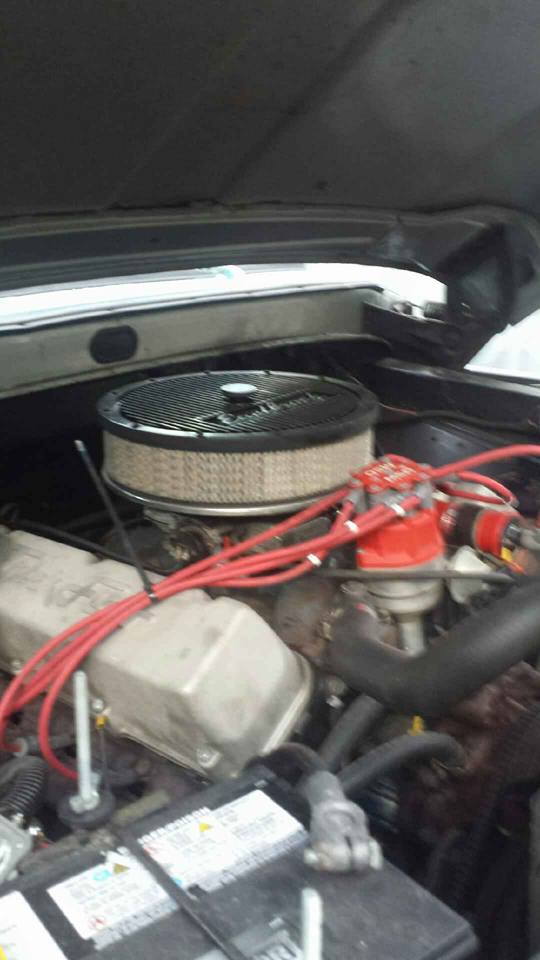
68 t-bird 429 thunderjet on c6 trans

80-day_1_9d626c8e3947c3e8648658801bc44b40d8bda598.jpg


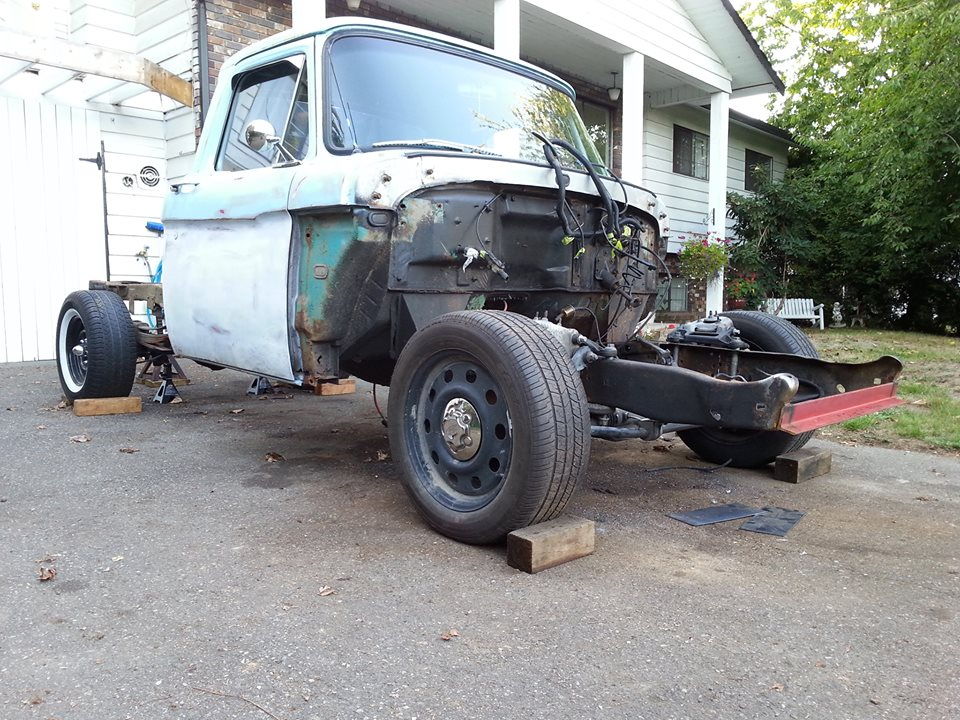
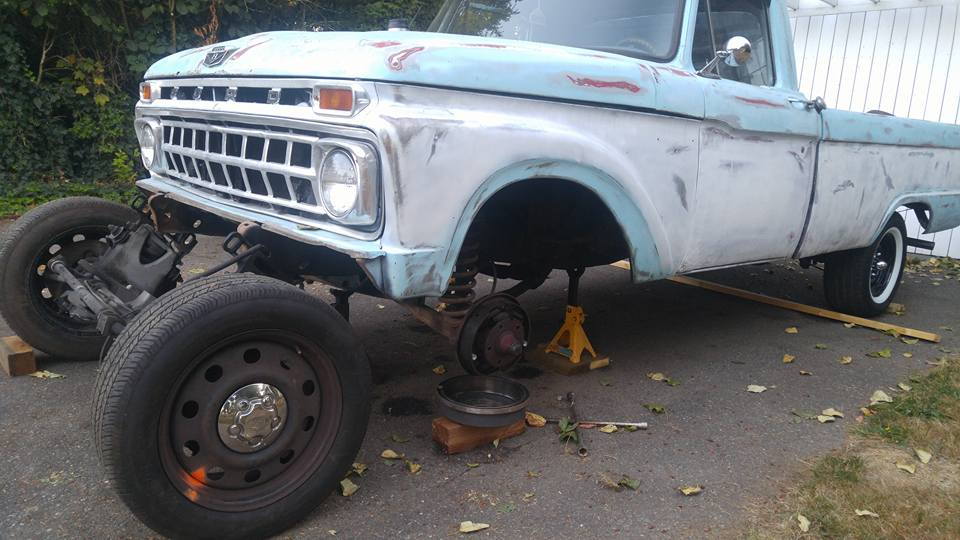
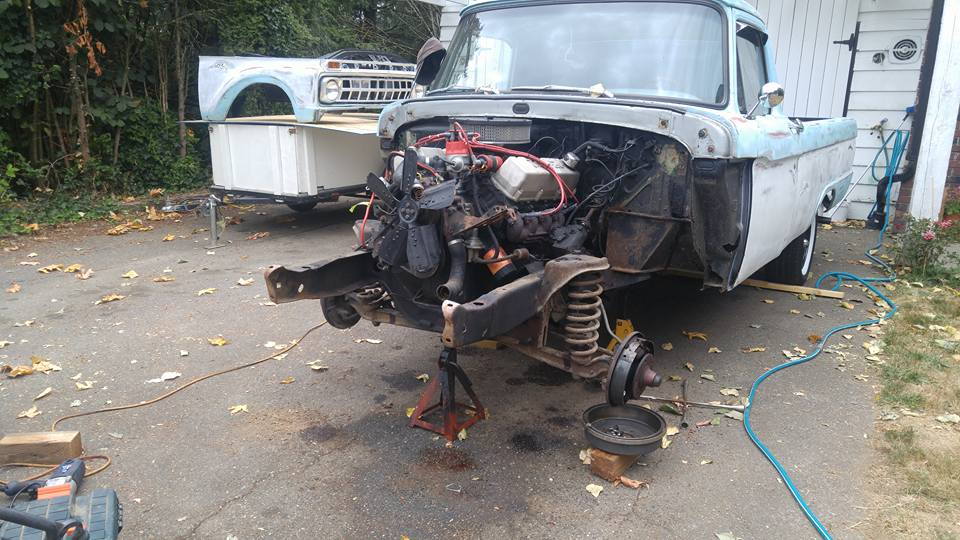
day 1 start removing tires and brakes since the passenger side removed itself already all by itself lol

80-day3_036bd8720e73caecb793e442712ffeb8640943da.jpg


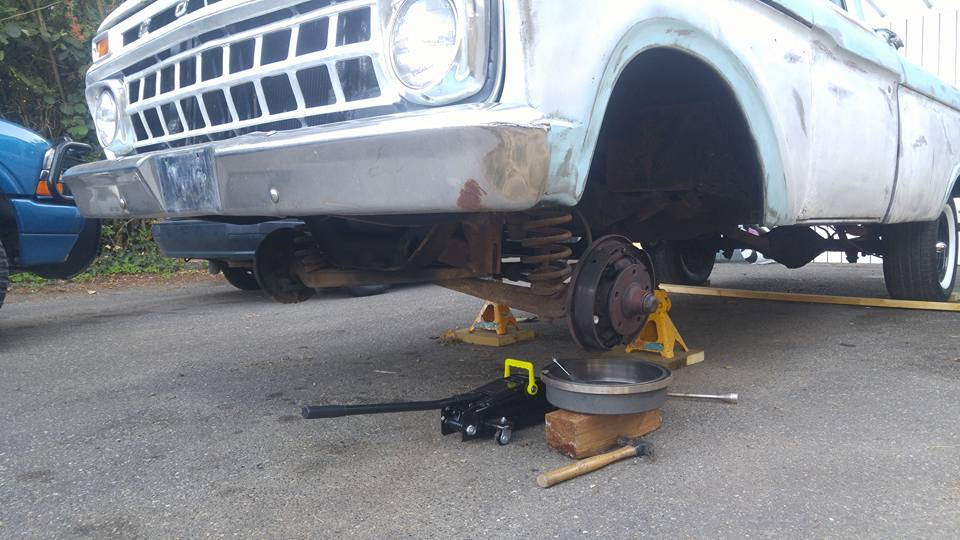
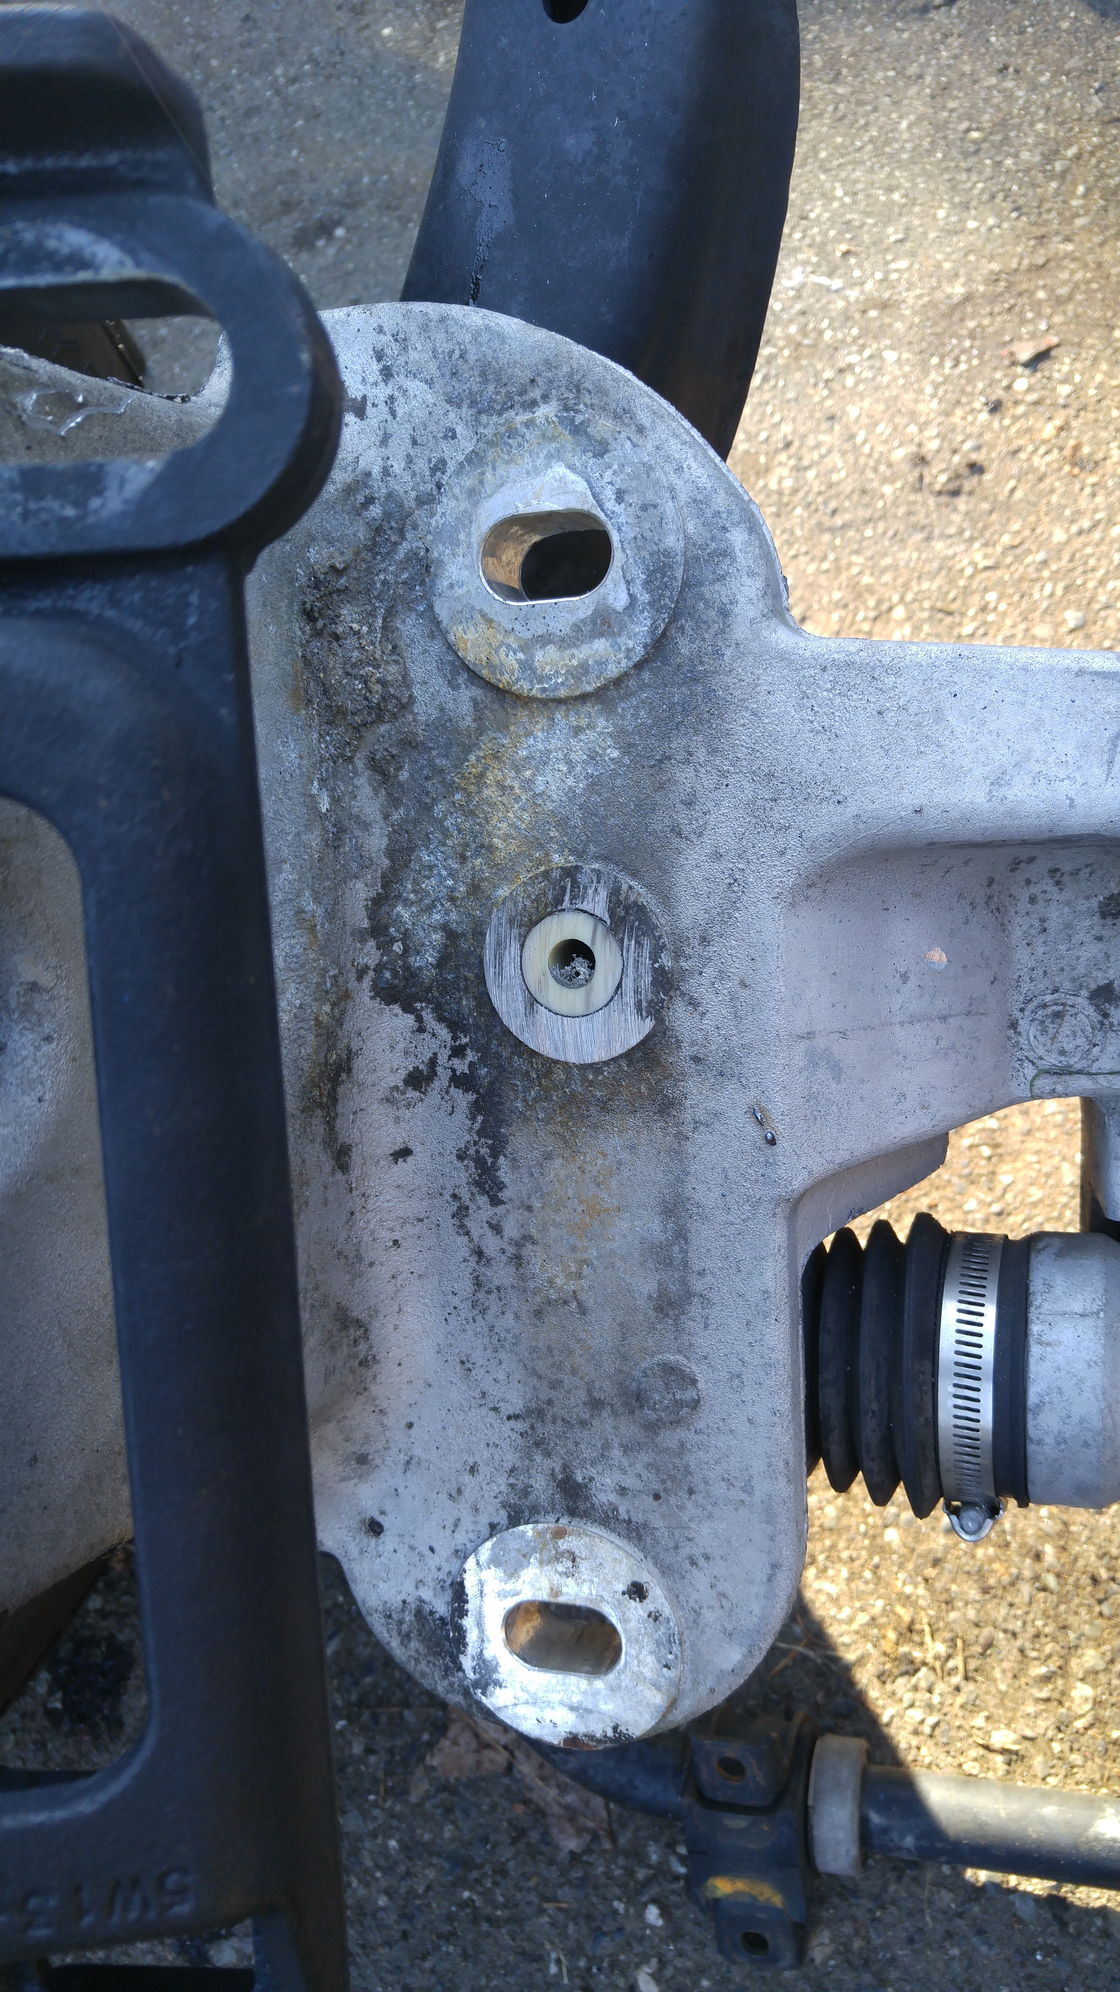
note my hub assembly holes for the studs

80-day2_cbea060f01482a3ea1e32a8c133d2db8ff28520c.jpg


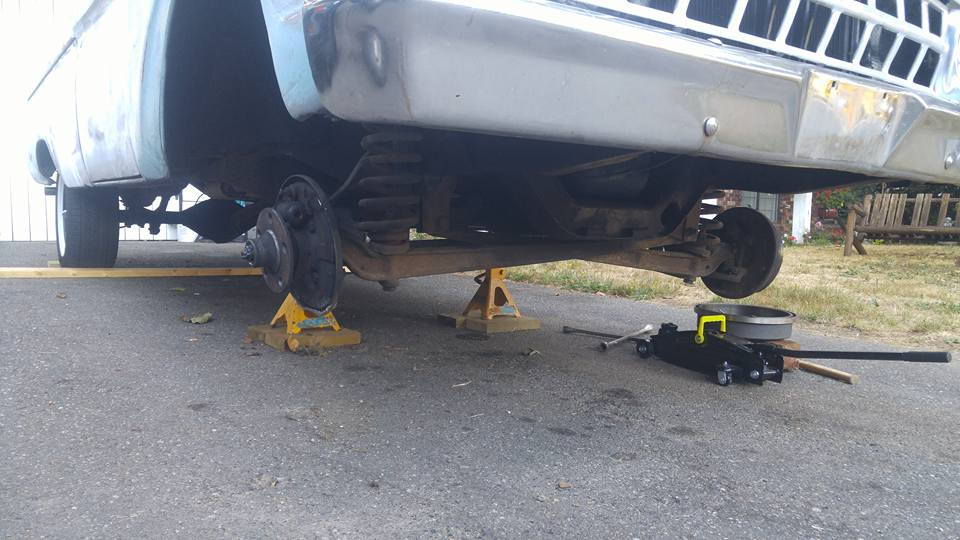
you can see how much bigger they are on the pass side Im lucky I was just cruising on my street when the tire folded under.


80-tare_down_a94ccd8d2a811452d30b8941c9398df28e2d22ff.jpg


so first on the list of to do's..drain the fluids and tackle the front clip.
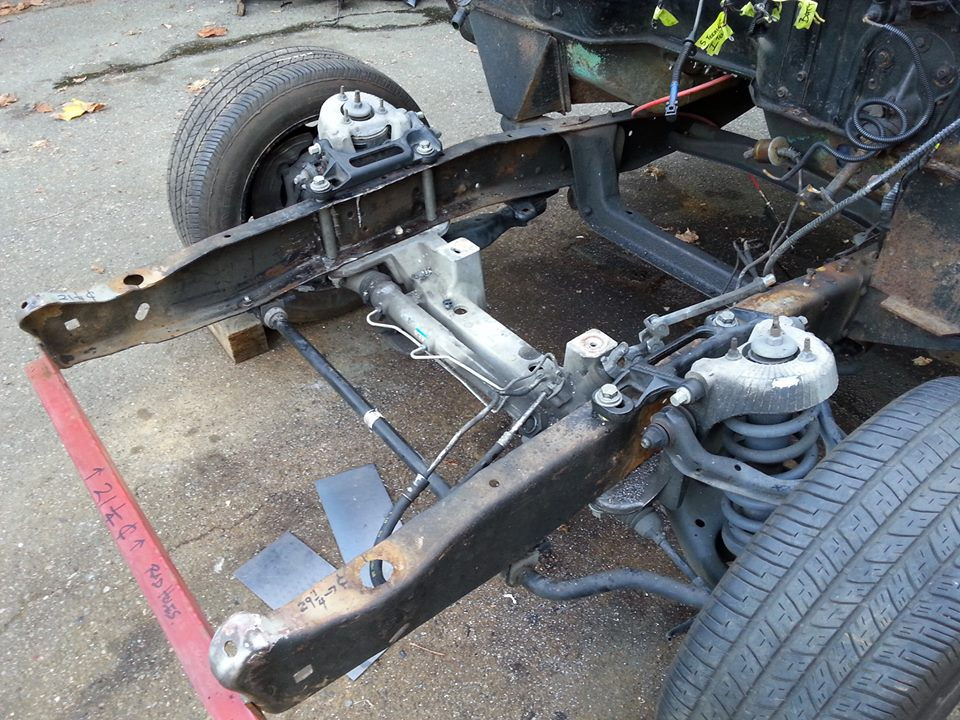
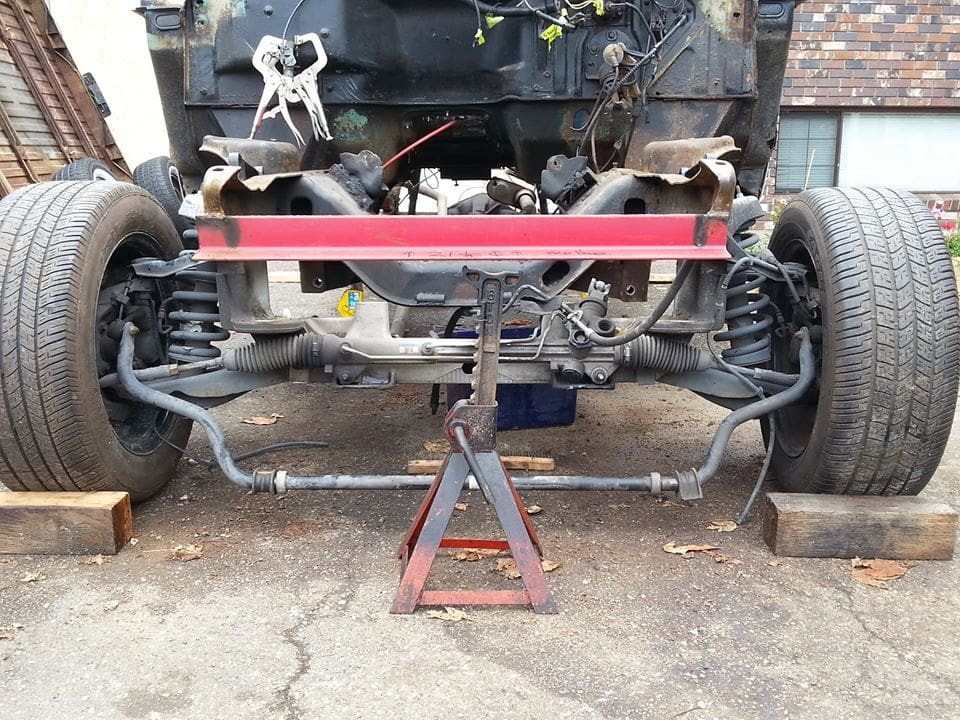
80-08_cv_p71_2_299768a056daf7373ea4bb4b2d44b28a4b0eb431.jpg


08 cv p71 subframe

80-tare_down_1_a1c2ea437483ac68530d361804481c60cc953975.jpg


so it went really well!. I spent 2 weeks just hitting every bolt with liquid wrench before actually starting the work
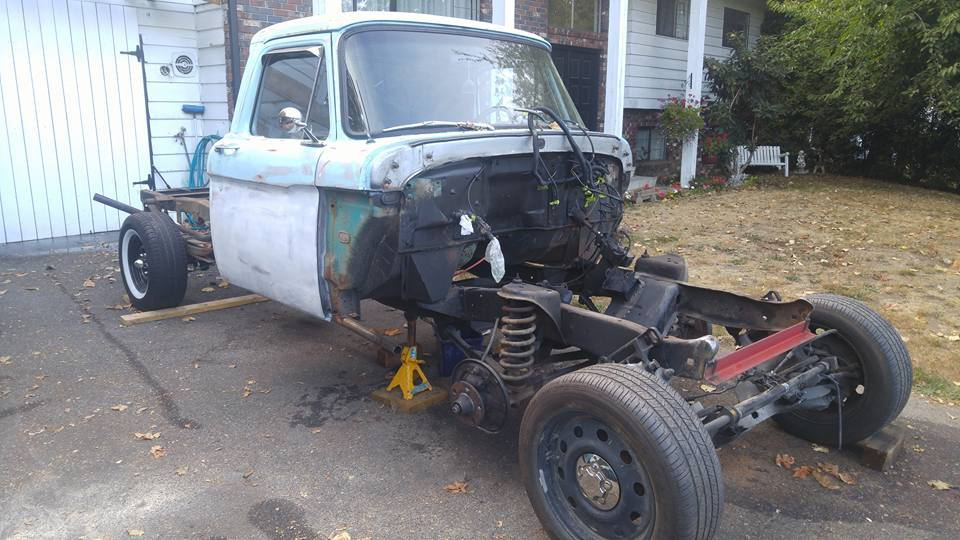
80-tare_down_2_19a8b851aba769fcc114f1dfd9525bf46915aacc.jpg


progress..

80-tare_down_3_0d32e0a0c774346c92471211fa204476ac039ca0.jpg


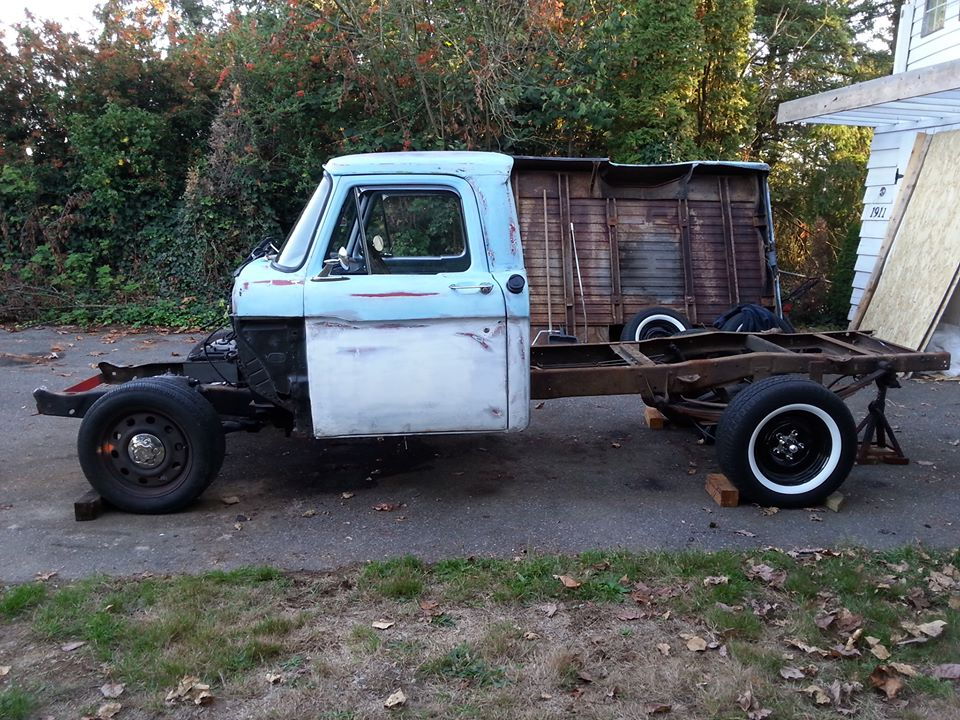
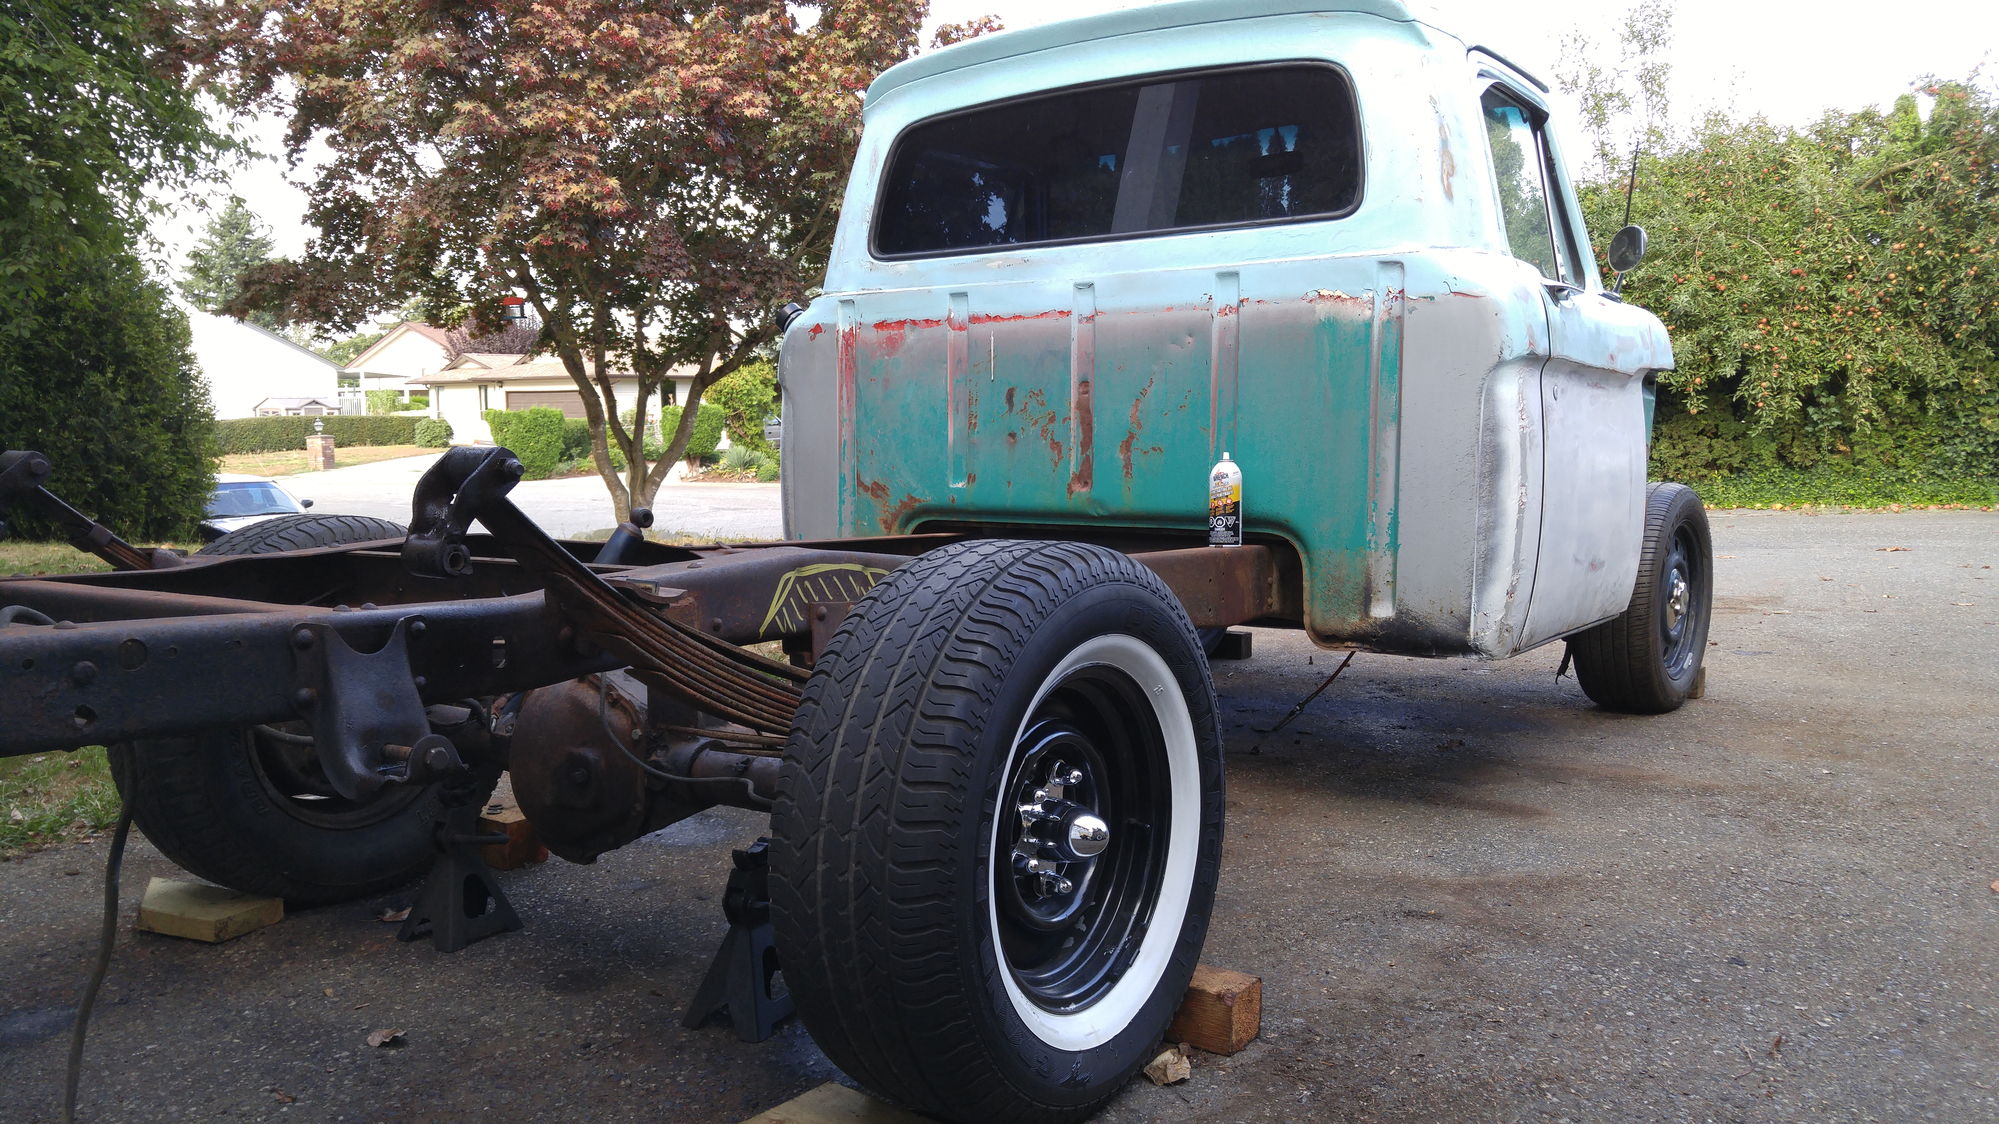
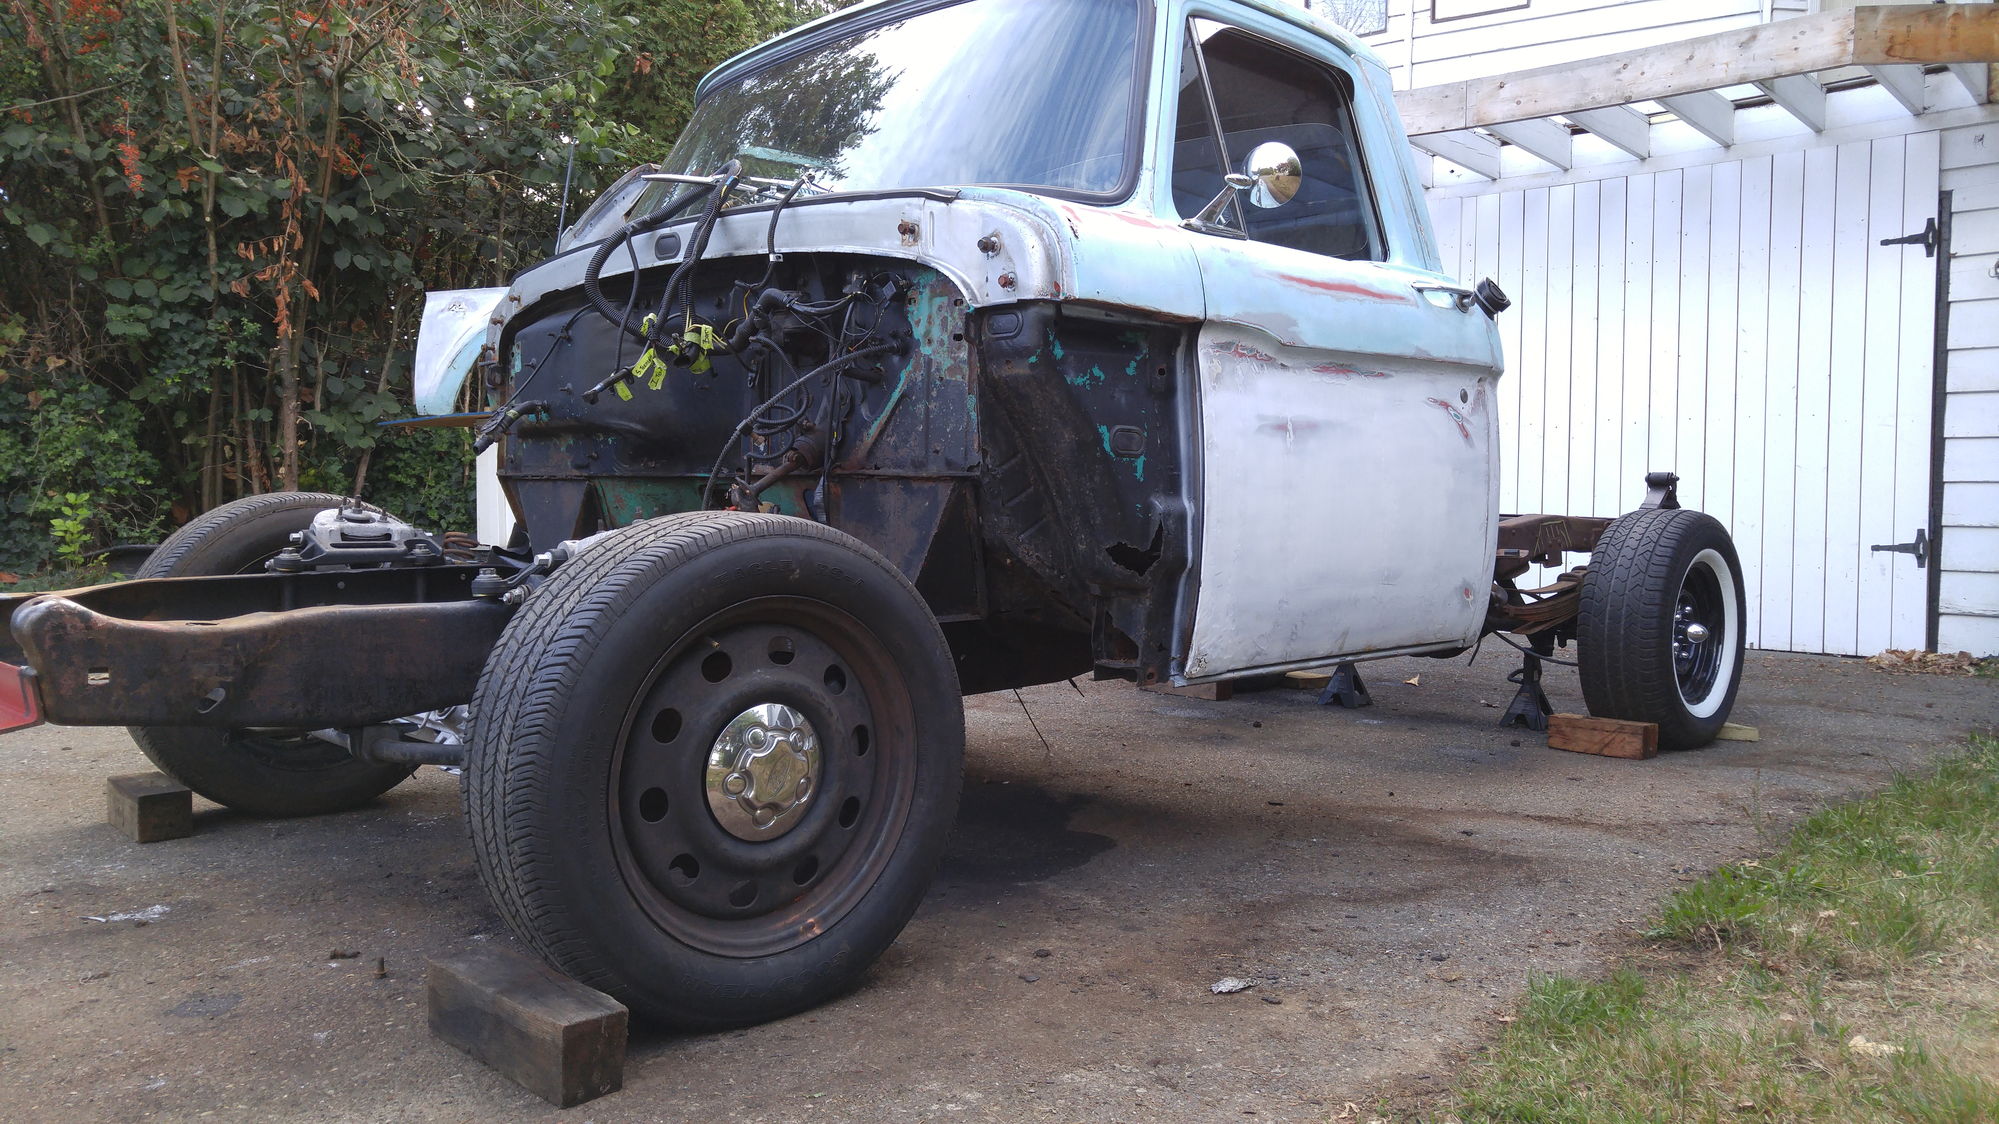
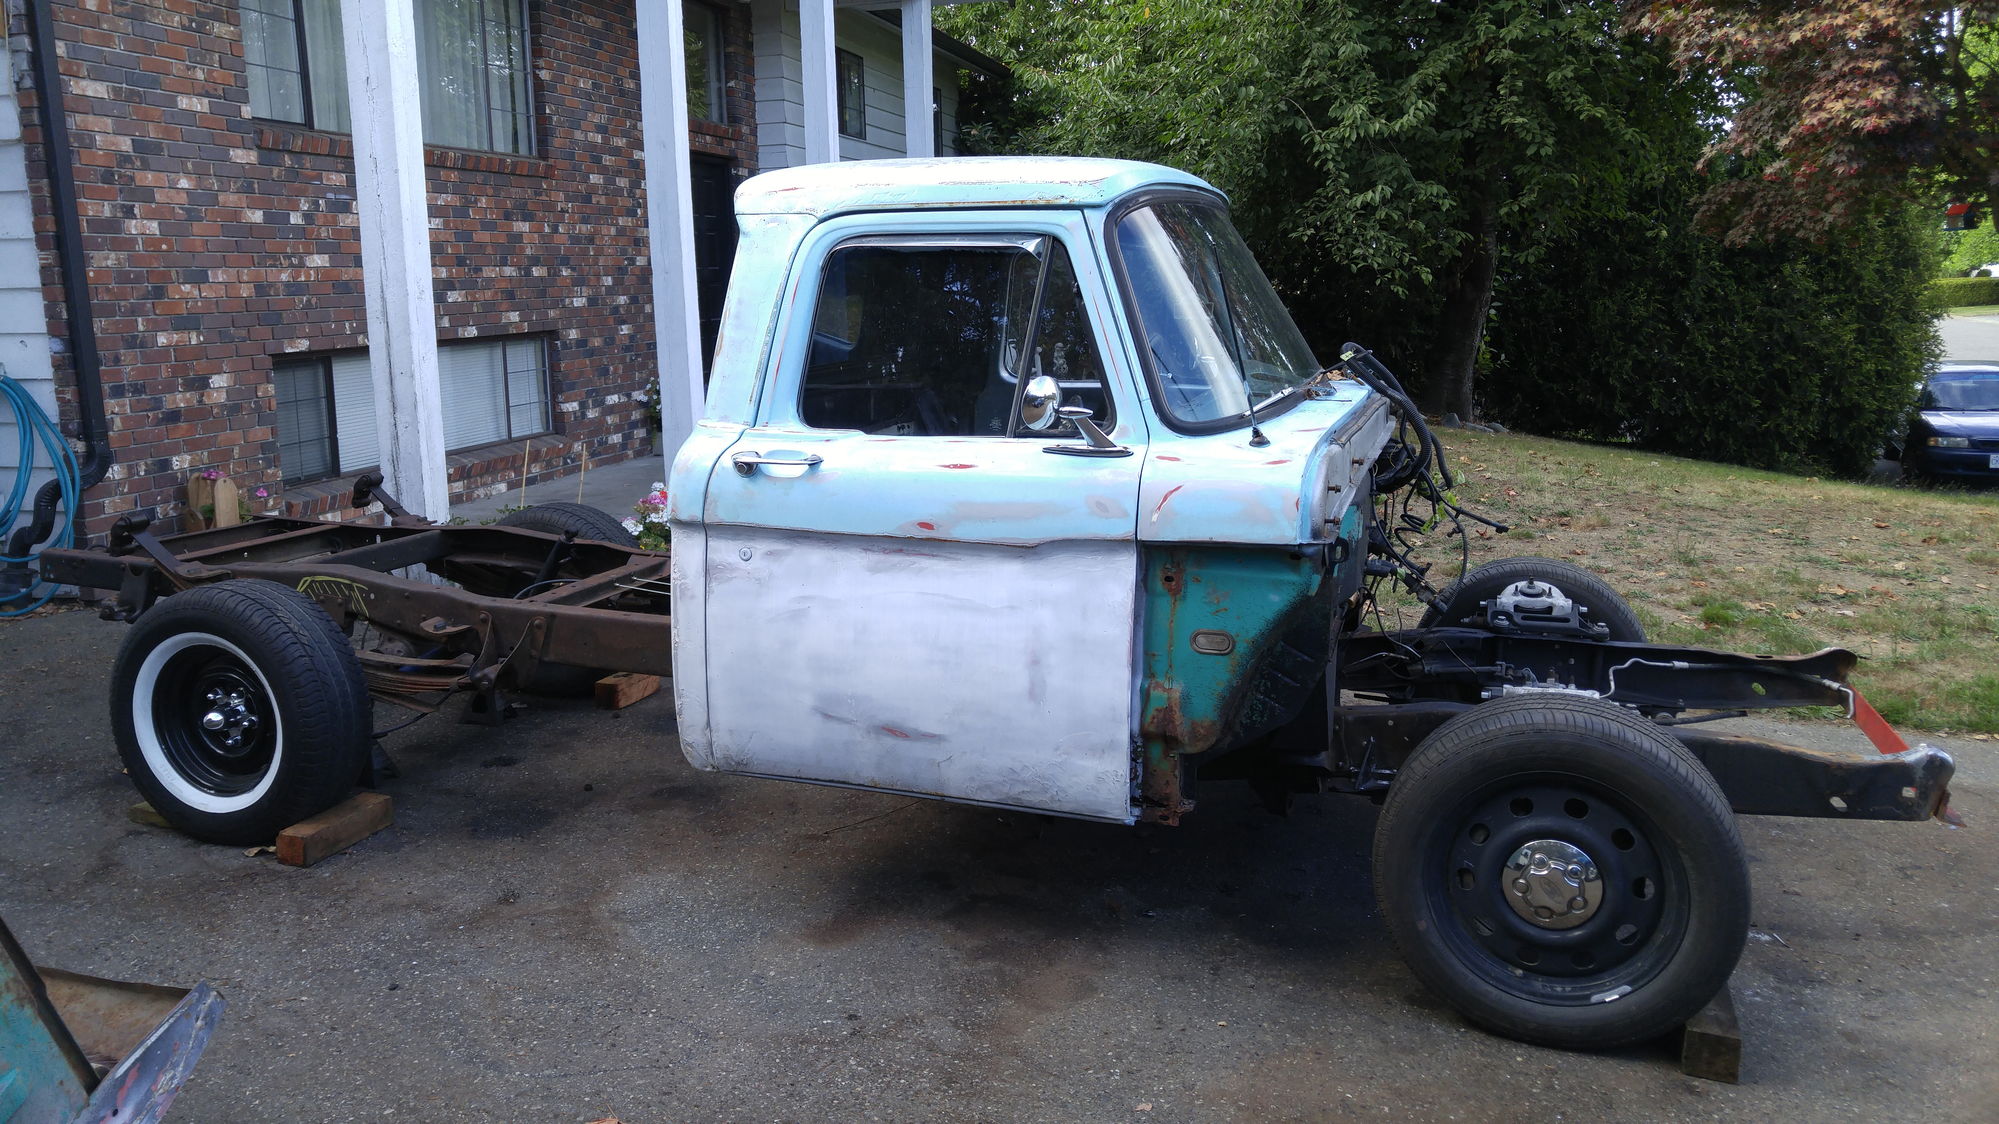
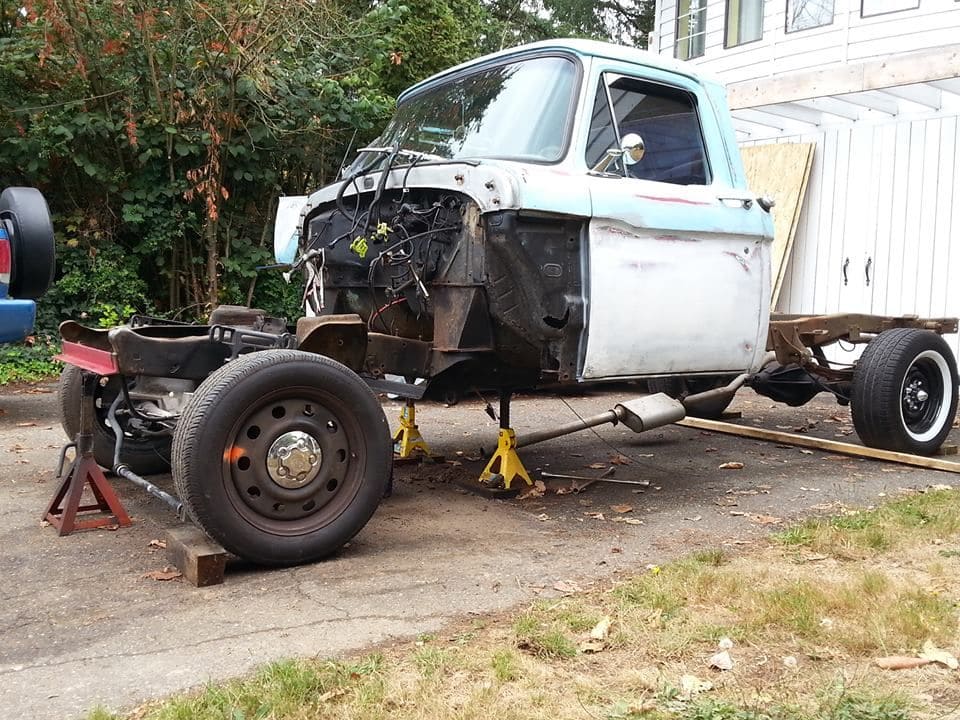
cab will need to come off to do the floors and mounts but thats later

80-tare_down_4_51ad7fad70d0278148008807080c4ceffc99f5a4.jpg


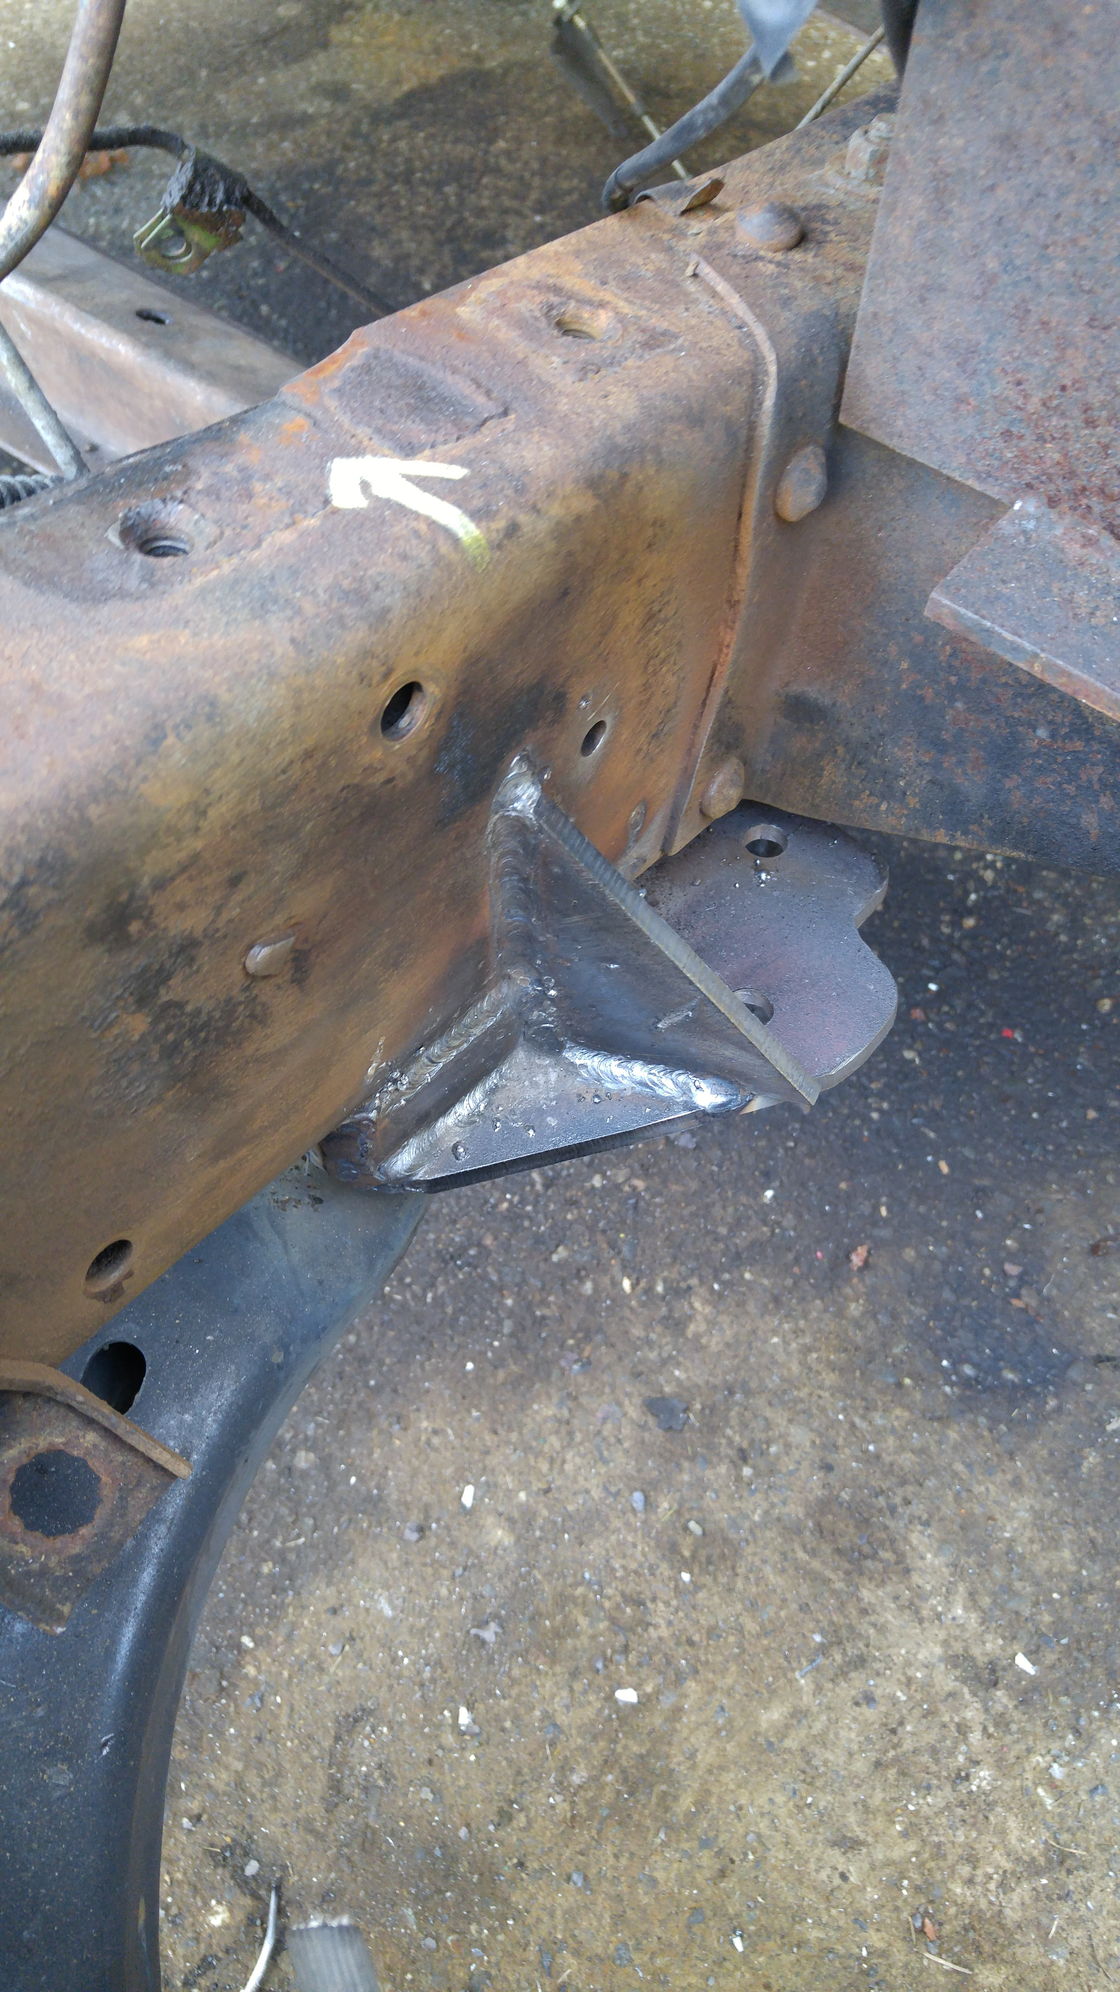
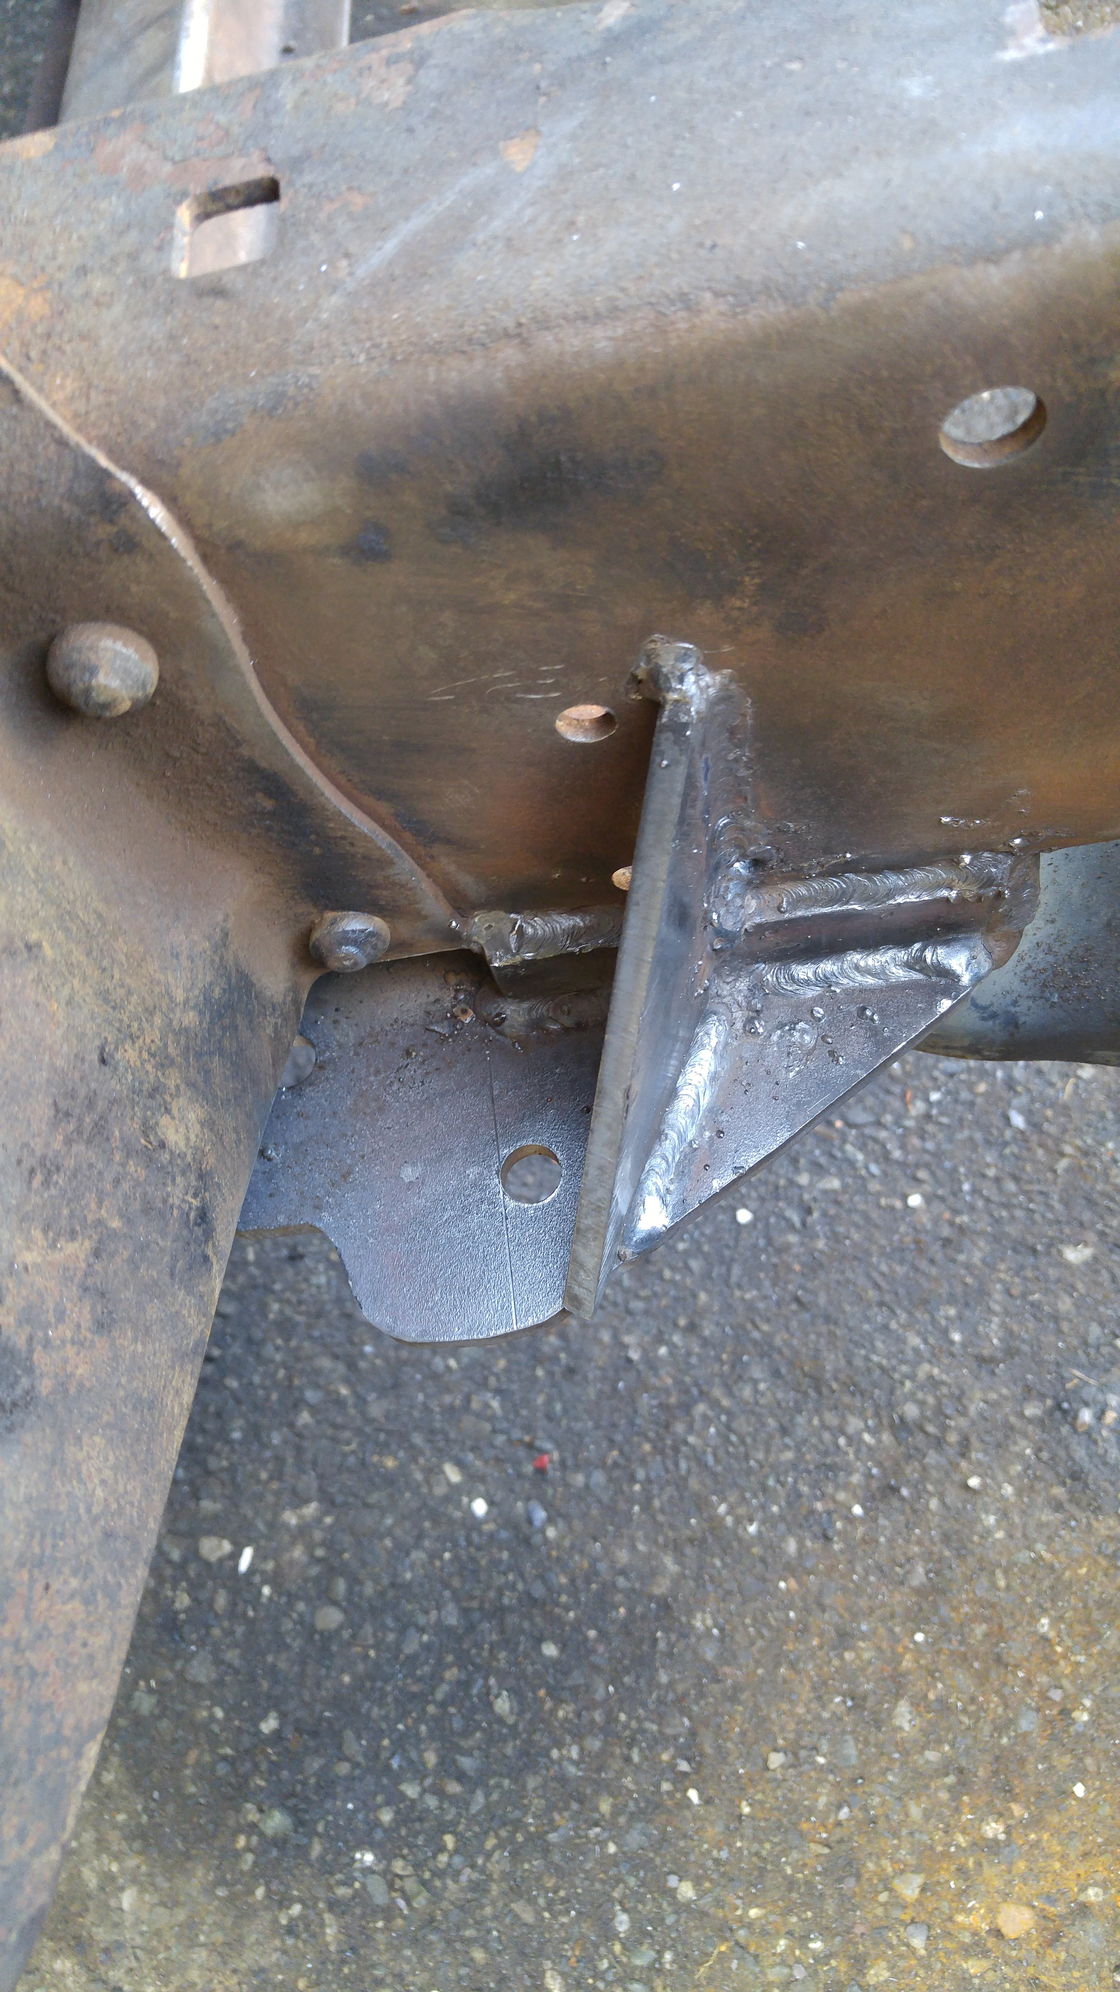
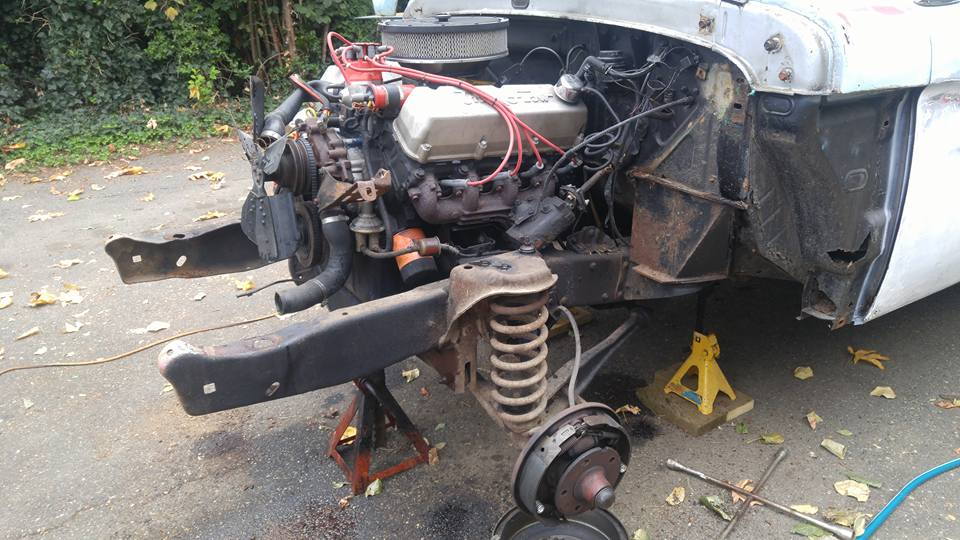
so next welded on the temp cross member and ready for a motor pull

80-motor_pull_cd927faee5aba18880b9a458866e6f9cd64695a0.jpg


so I called my buddy LOL

80-motor_pull_2_097c5aaa7e966a07272d79f9da7e133666421ed5.jpg


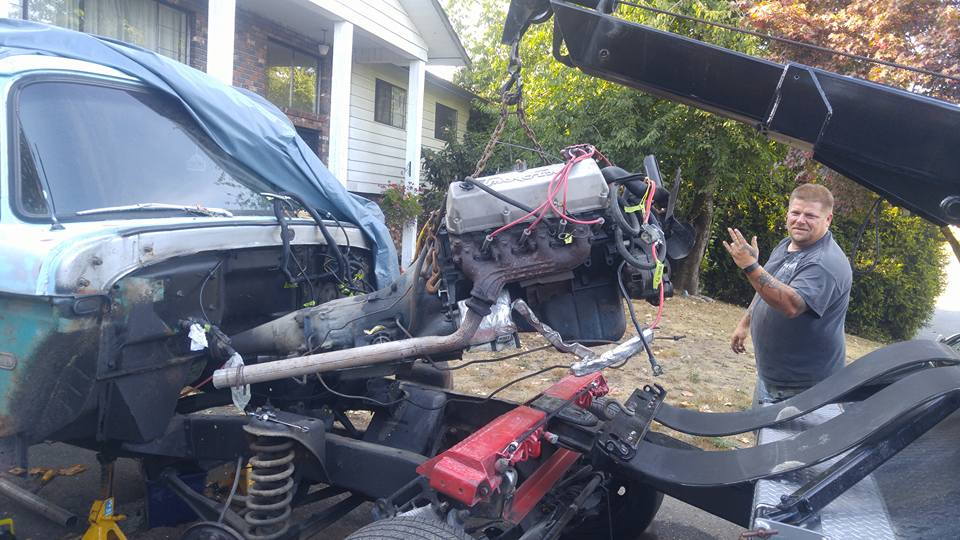
too easy really again I dont have all the tools but I do have amazing friends and family!

80-cross_member_2_28e80871d5ada77b51798af0a9eab4ff64bb6291.jpg


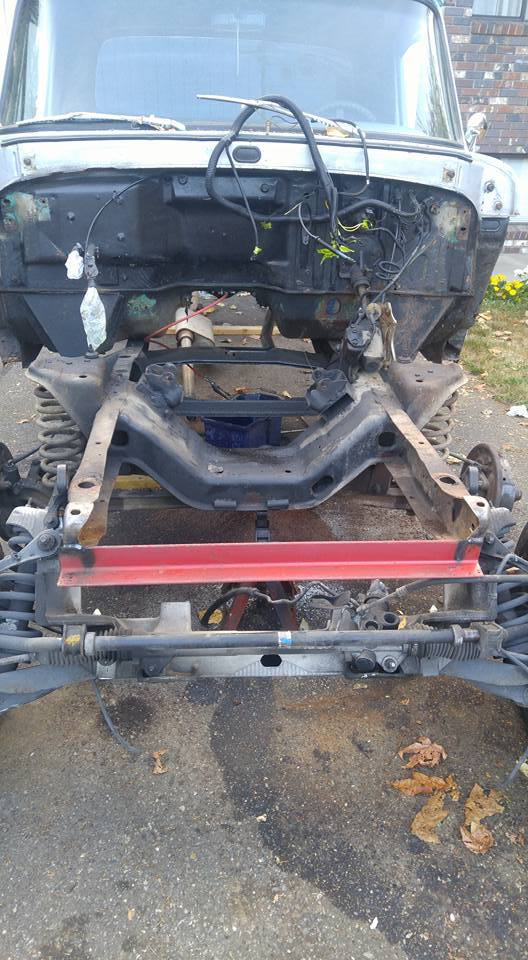
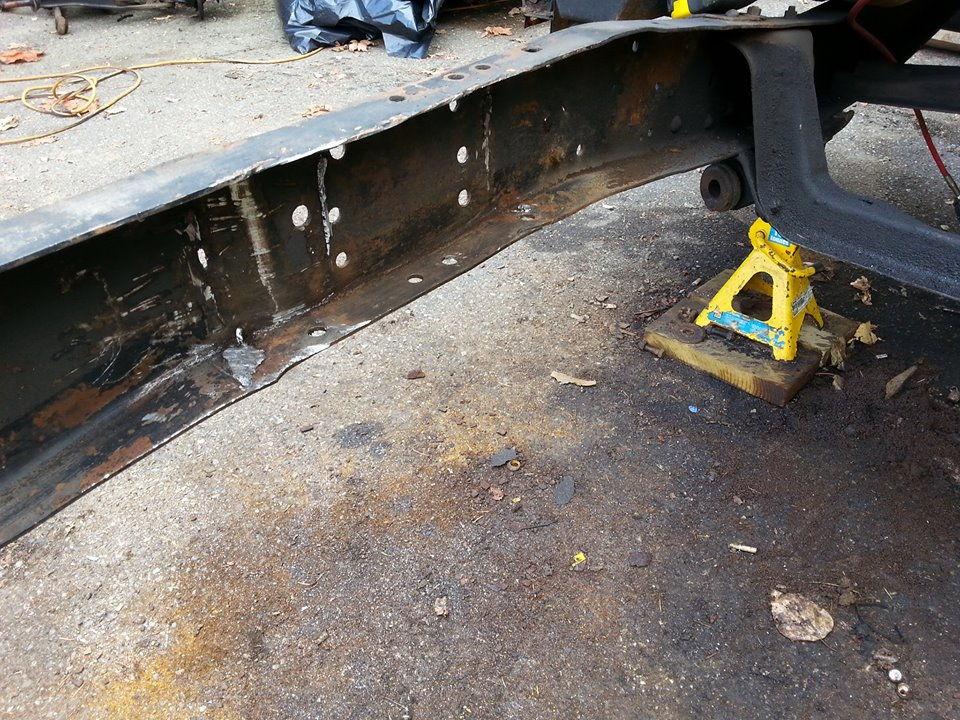
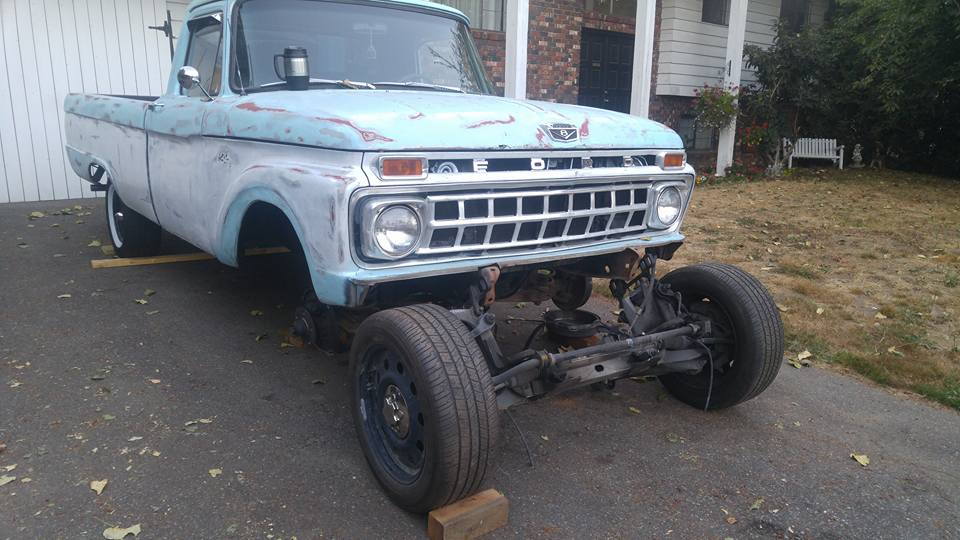
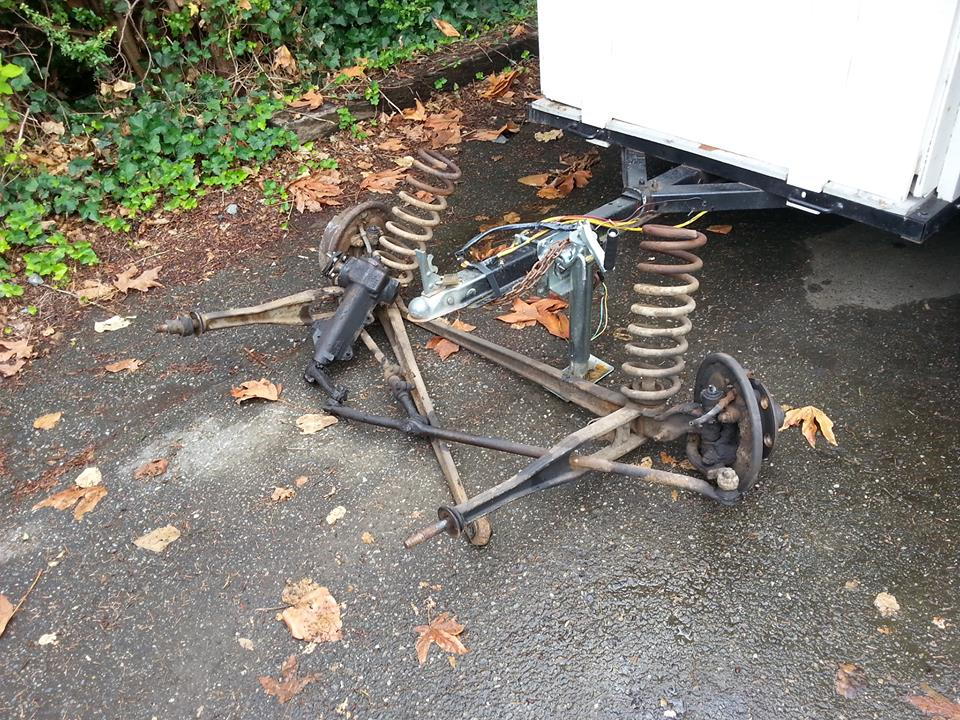
well with the motor out the next step is to mark out the old axles centerlines on the frame rails and pull the old ibeams out

80-i_beams_63da4df2d291e6effe9ac24b81658eef99746e8c.jpg


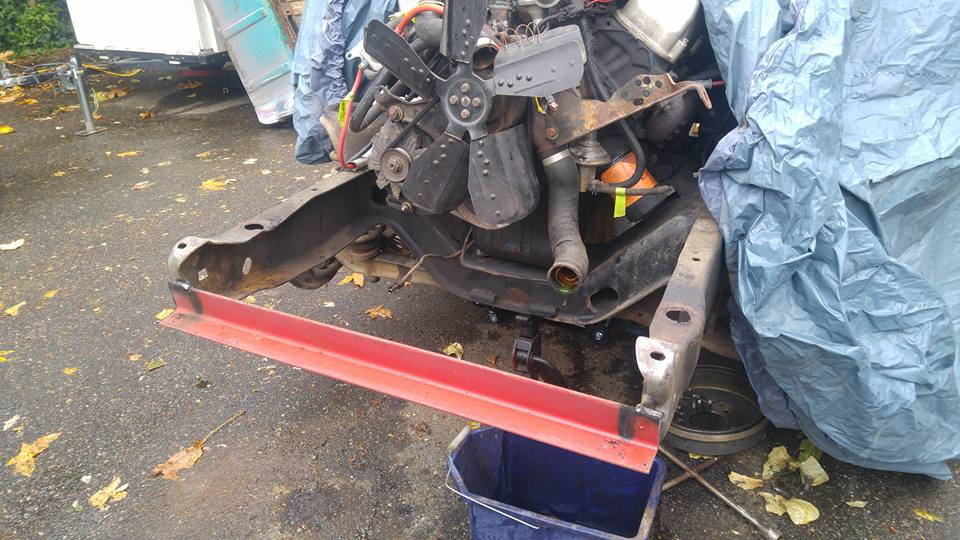
just a progress pic very happy!
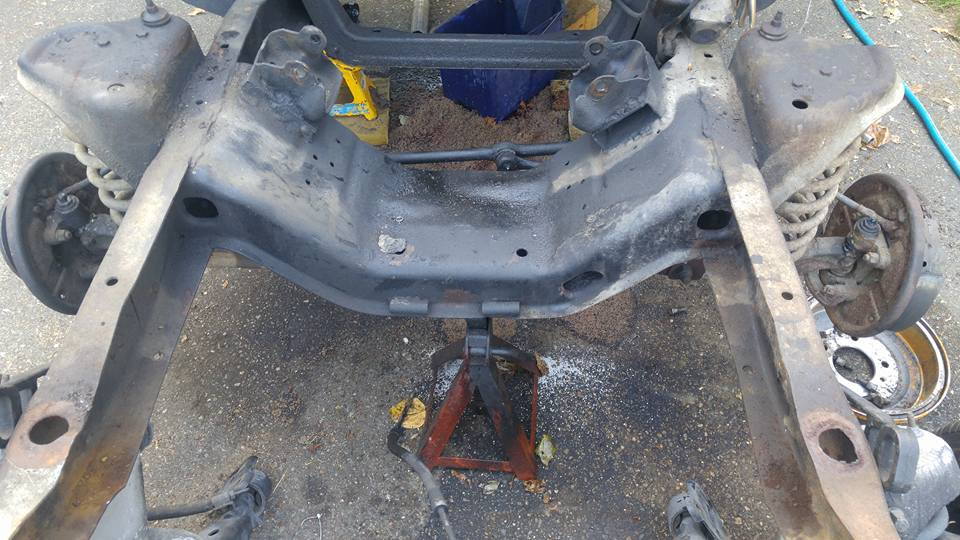
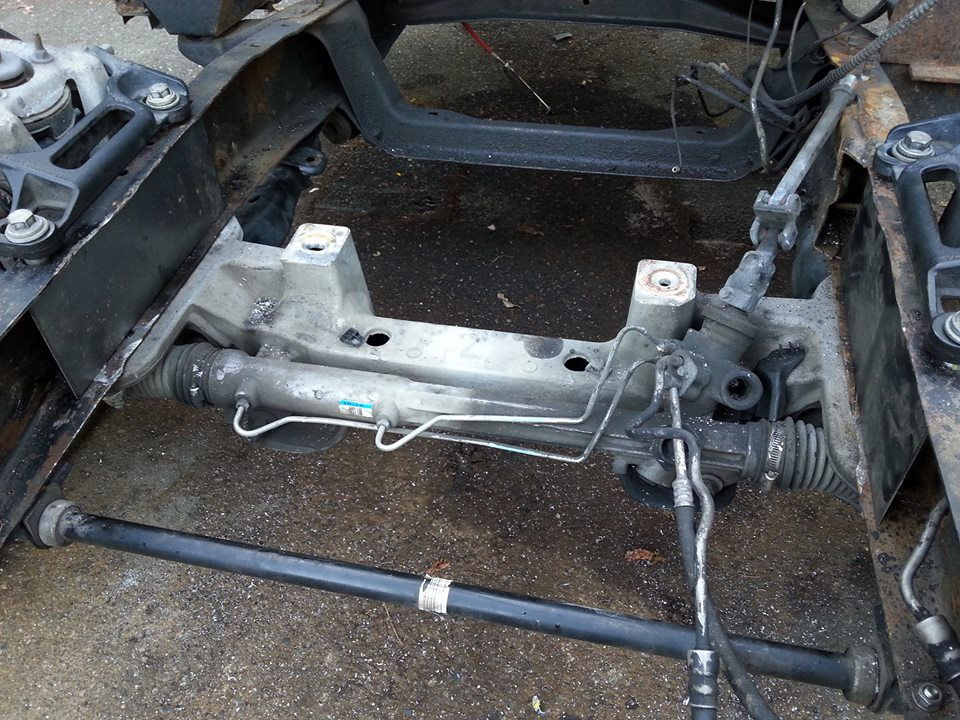
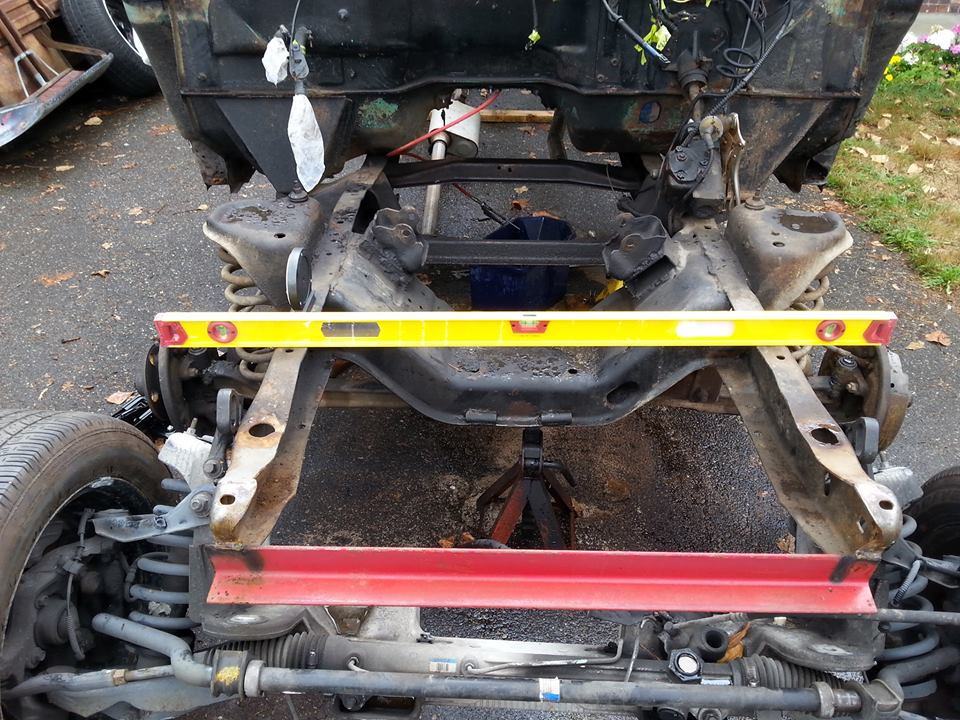
80-cross_member_3_64ea5eadf13e5ea1fed1c1bc06b67fcd1aa081dd.jpg


cross member shot

80-08_cv_p71_3_53c851c348b19d7d024c1884639bbf40855b1b9f.jpg


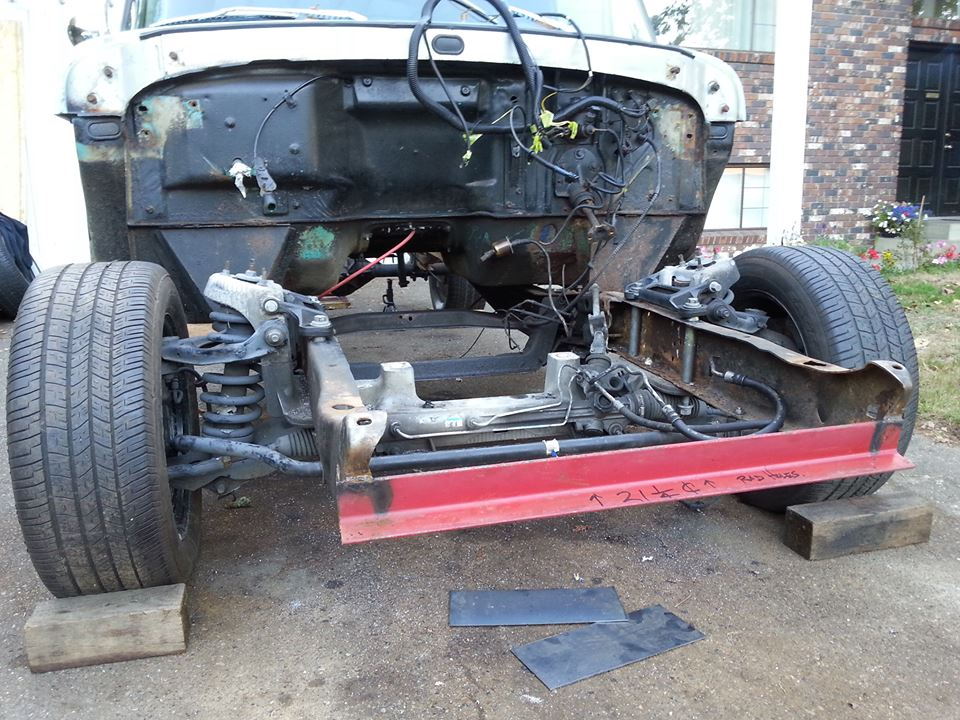
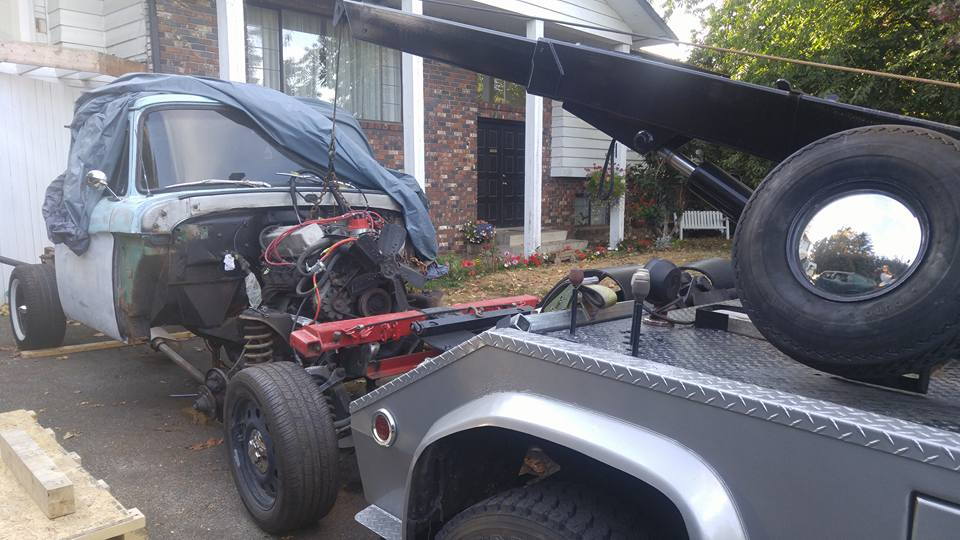
another cv subframe shot before tare down

80-tare_down_5_079aabc3d11dd86c7a64b569bdcabbff09086b50.jpg


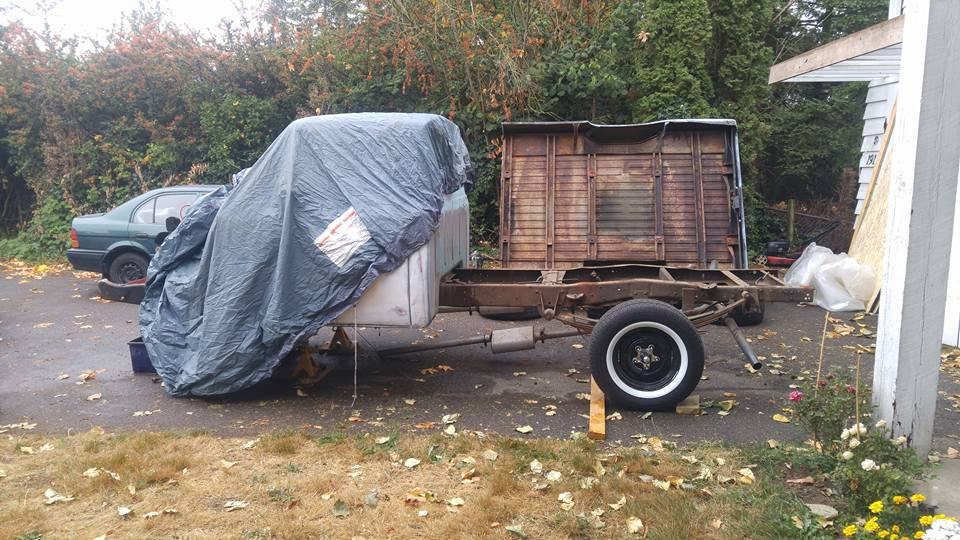
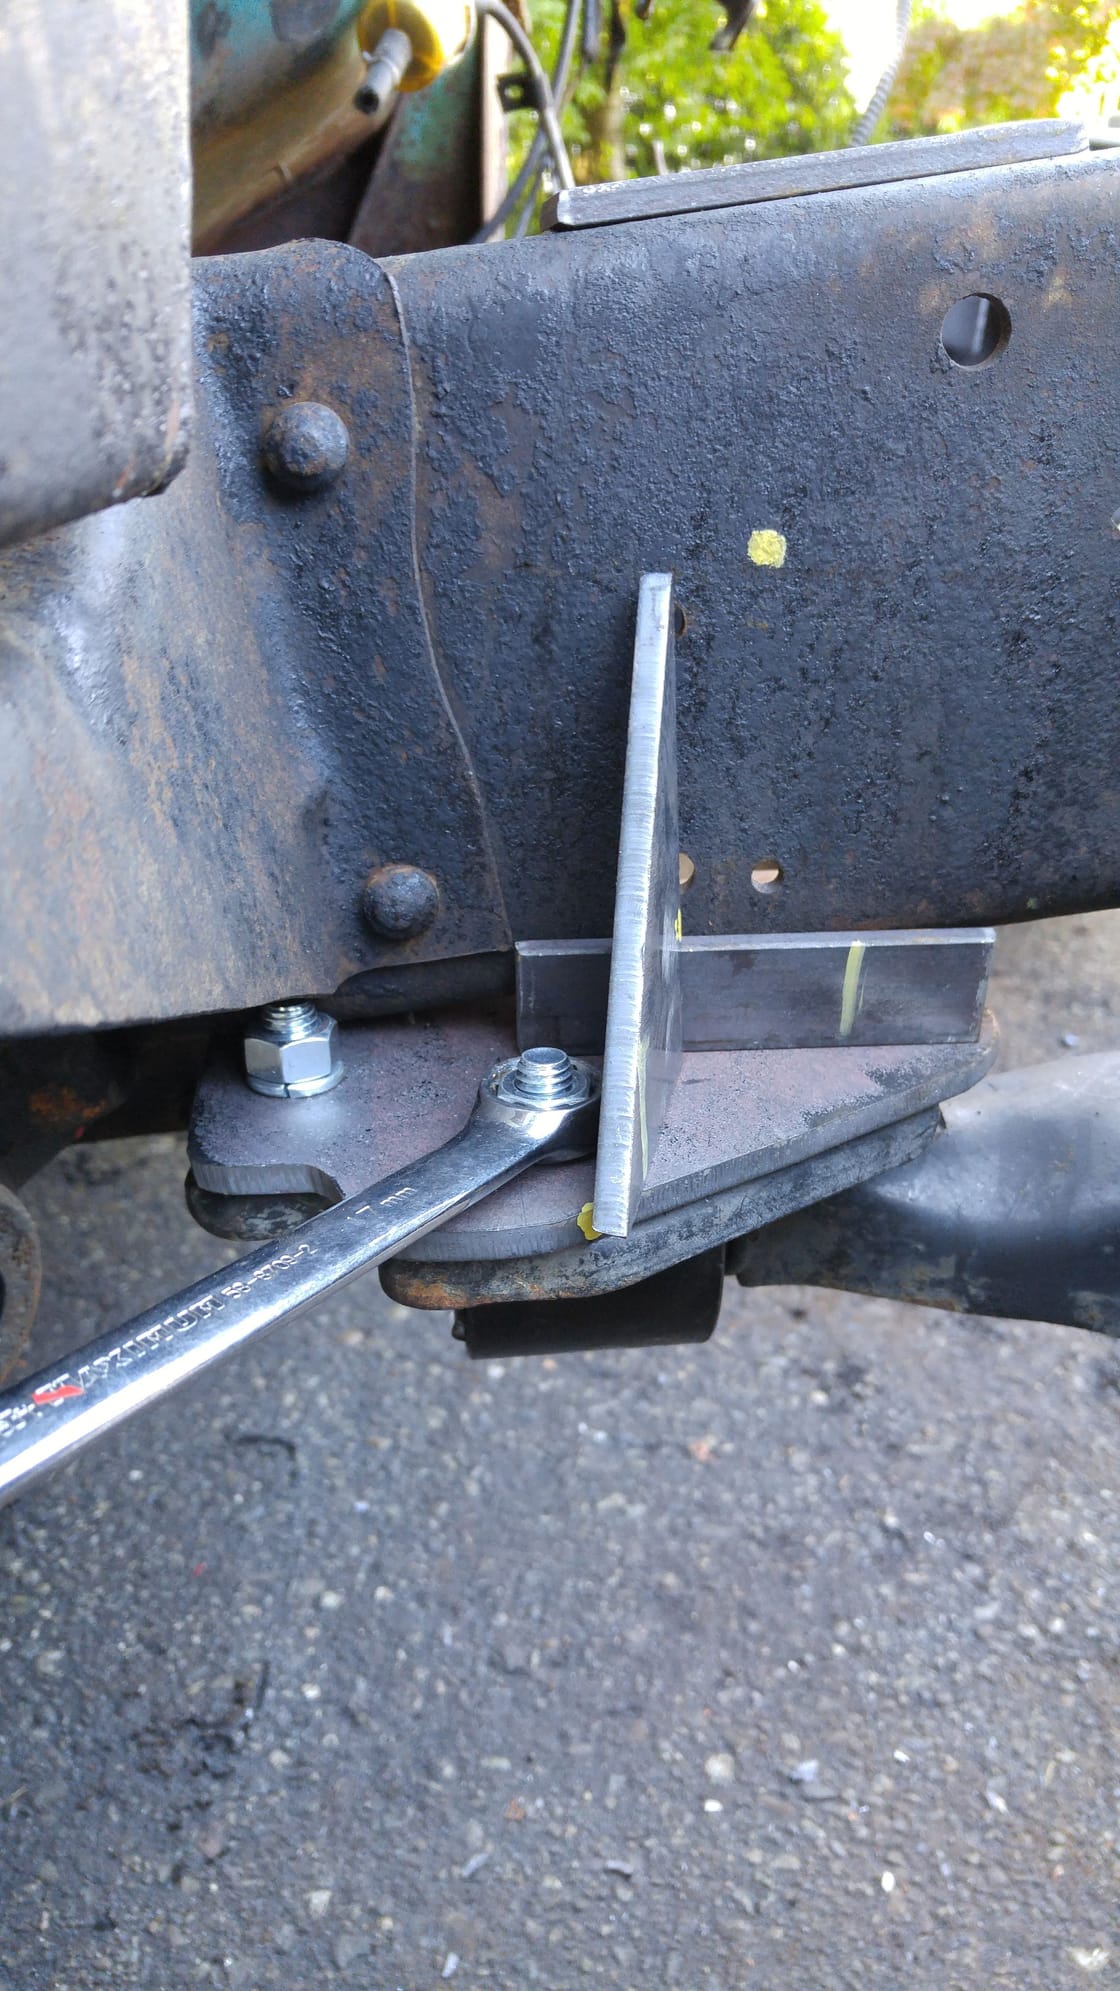
so I got the box off too , I want to have the floors fixed up on that and also deal with the rear axle flip or swap or just hanger kit well see ...still researching on this and pondering..

80-ed_ritch_0f65c15b12fdf2af160474a1afd8c522ef419de5.jpg


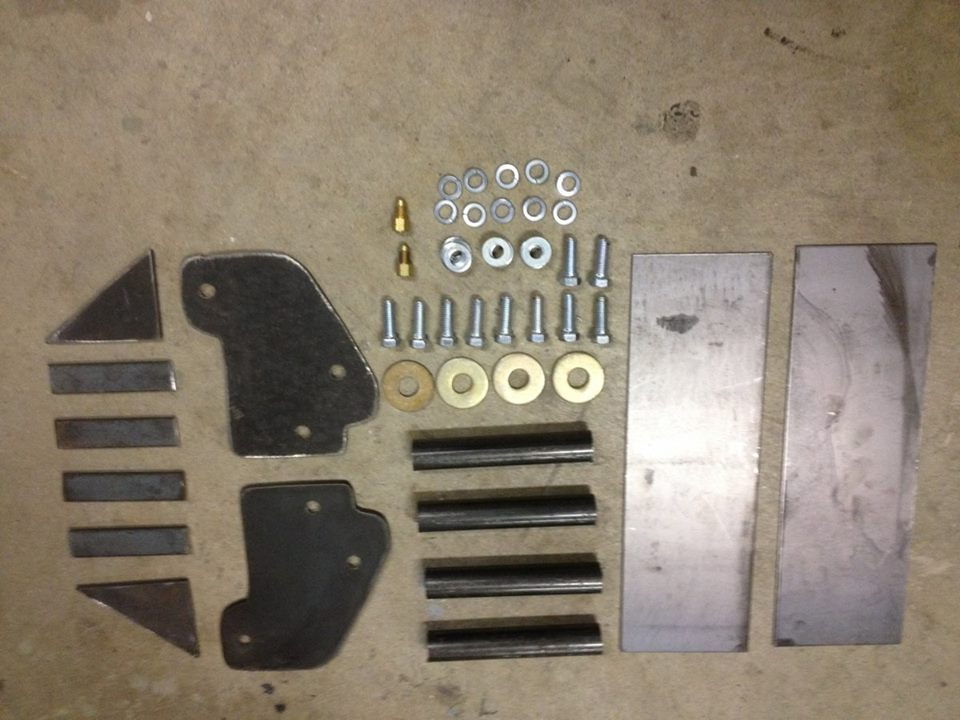
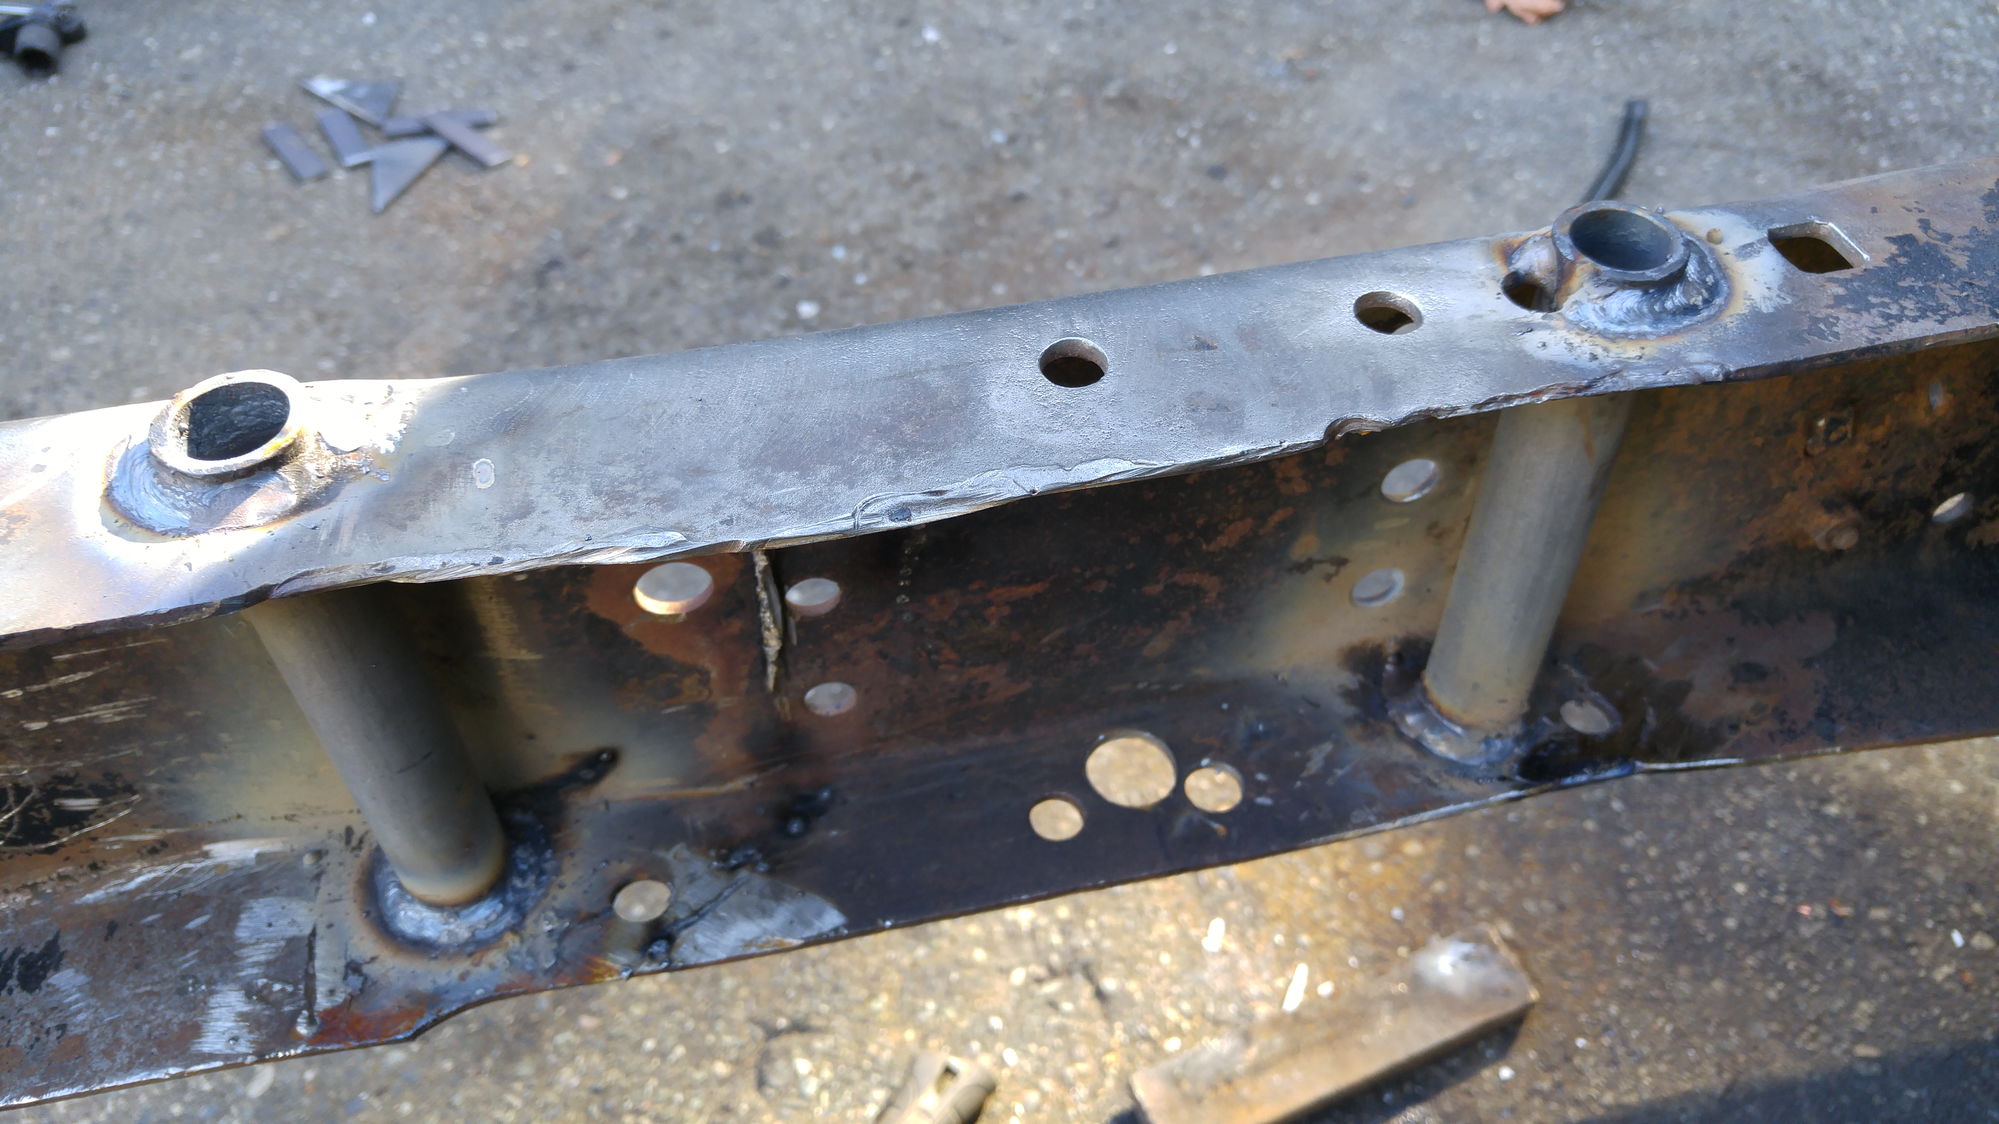
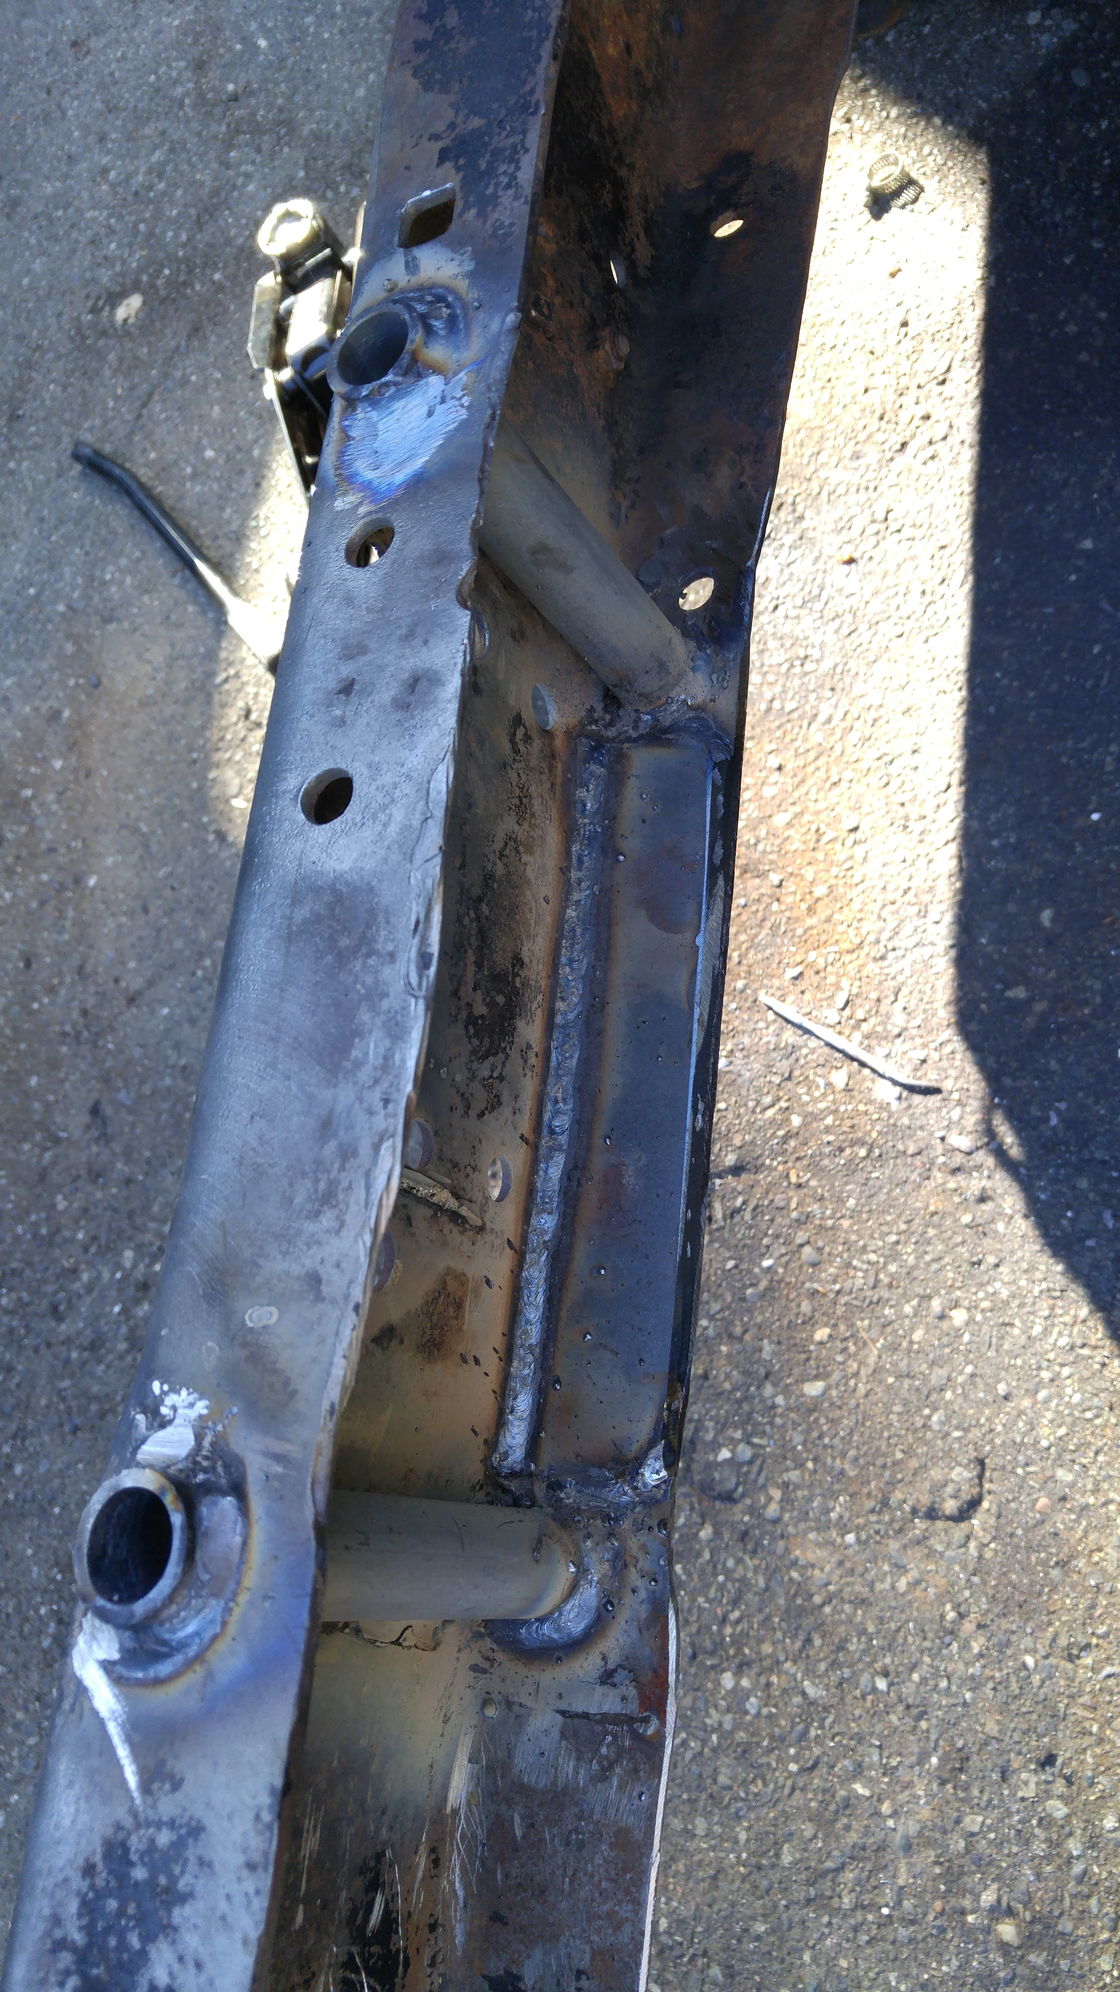
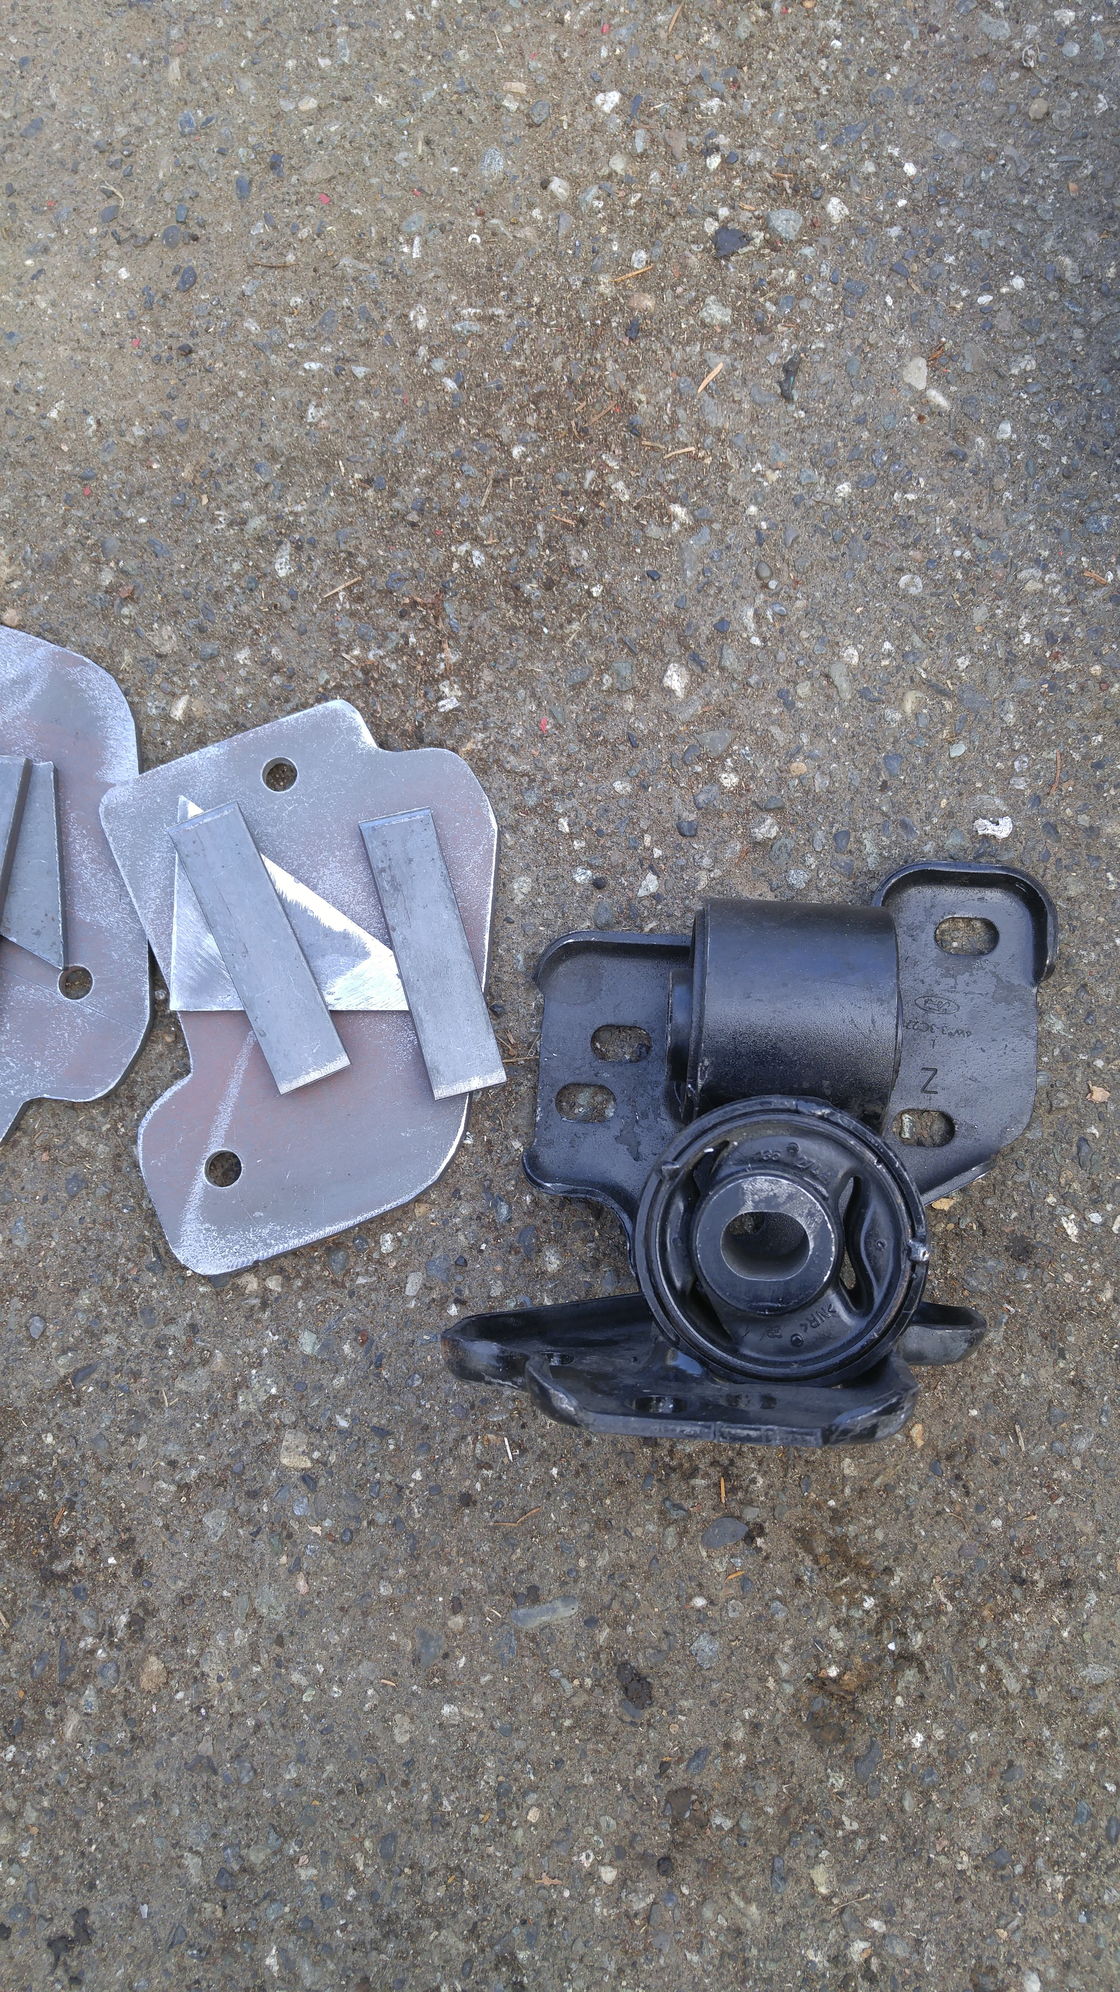
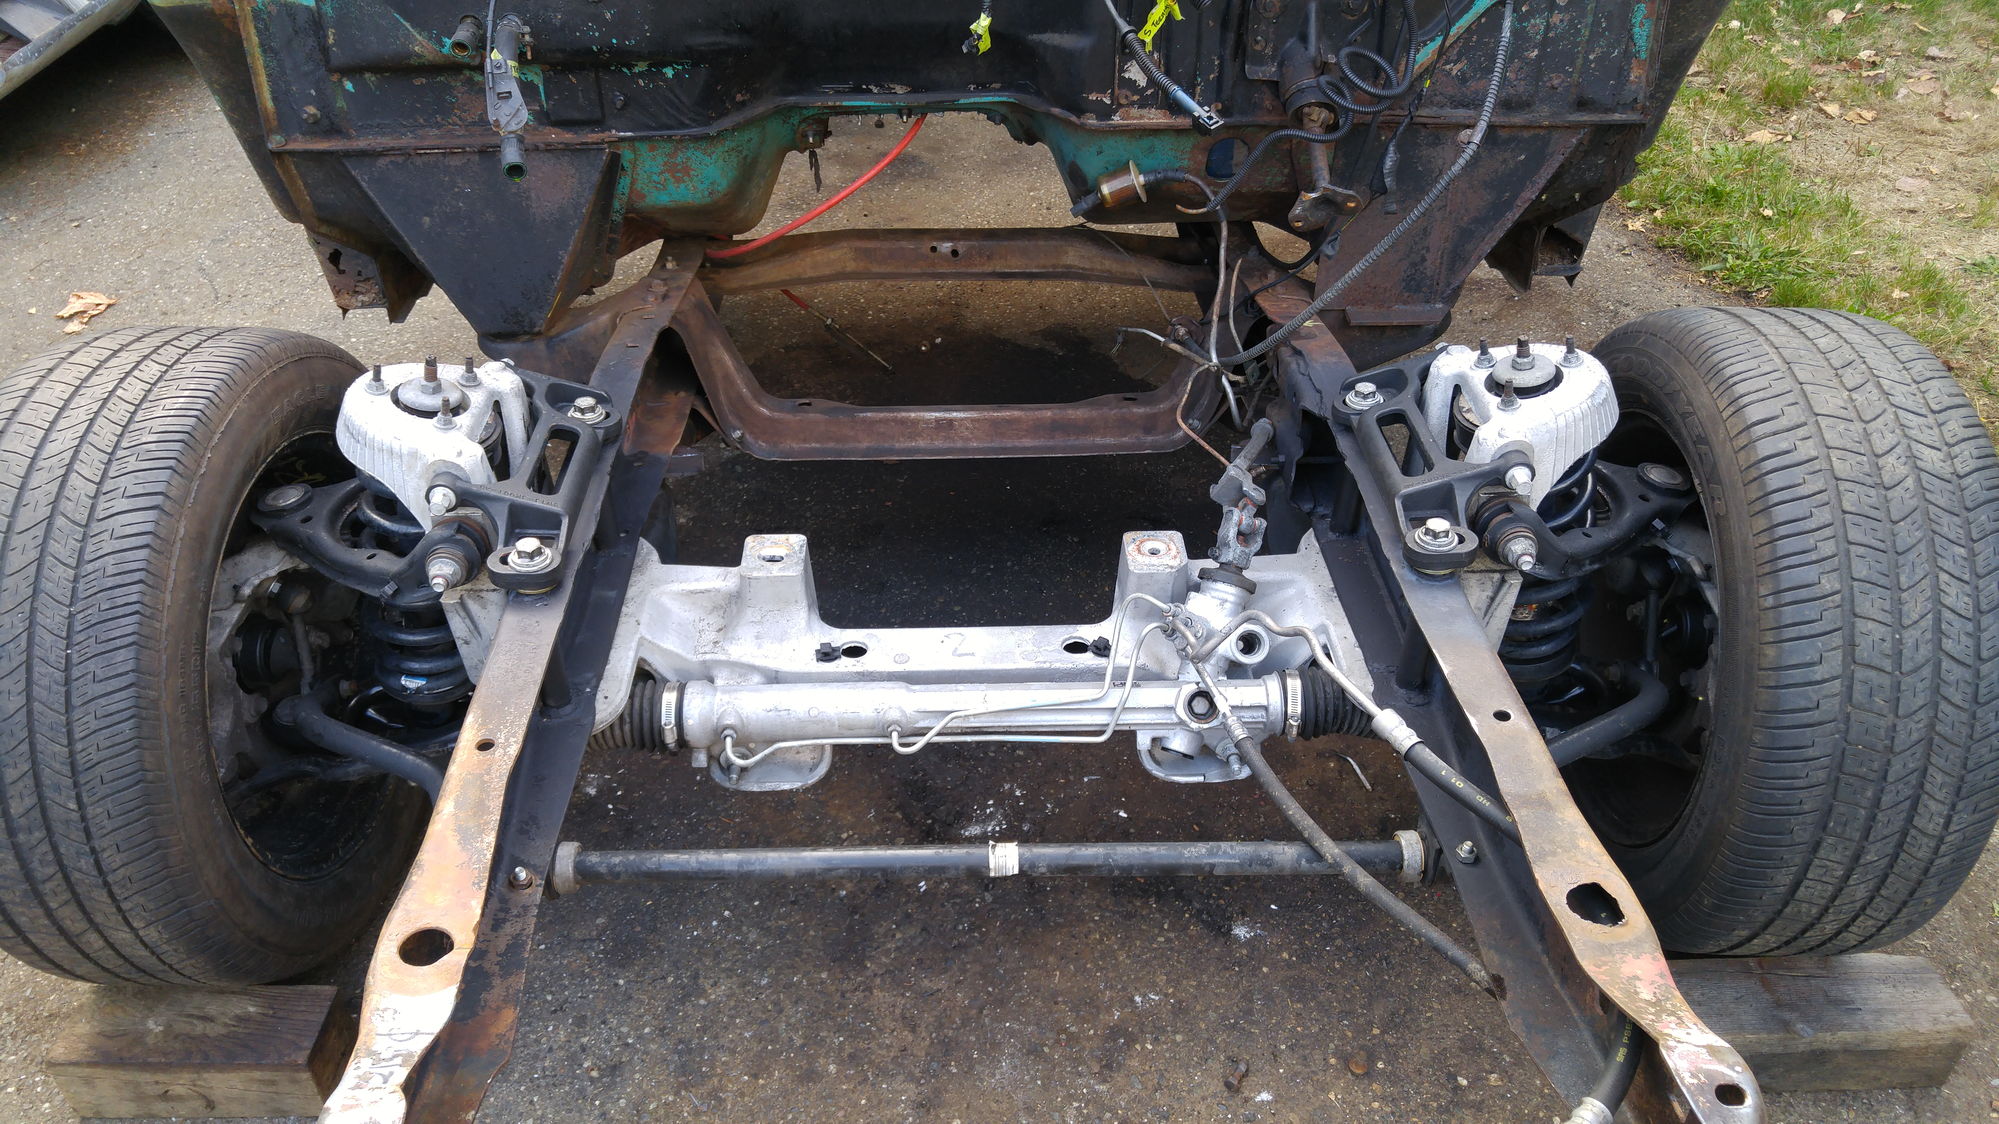
this is the ed ritchie cv to 66 ford mounting kit complete and ready to rock..

80-cv_to_429_motor_mounts_25acb15a264015cffe553fb2c16b424a315324e0.jpg


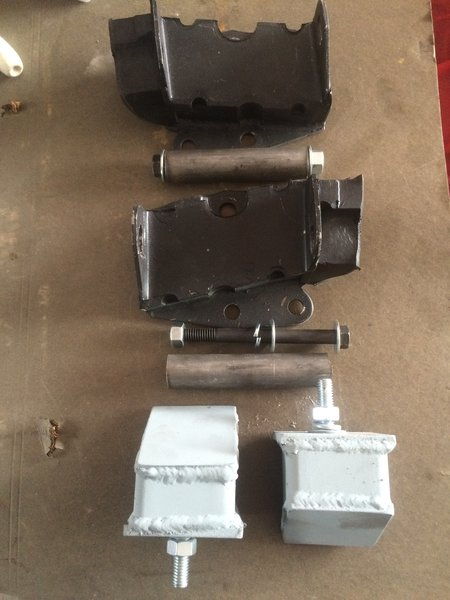
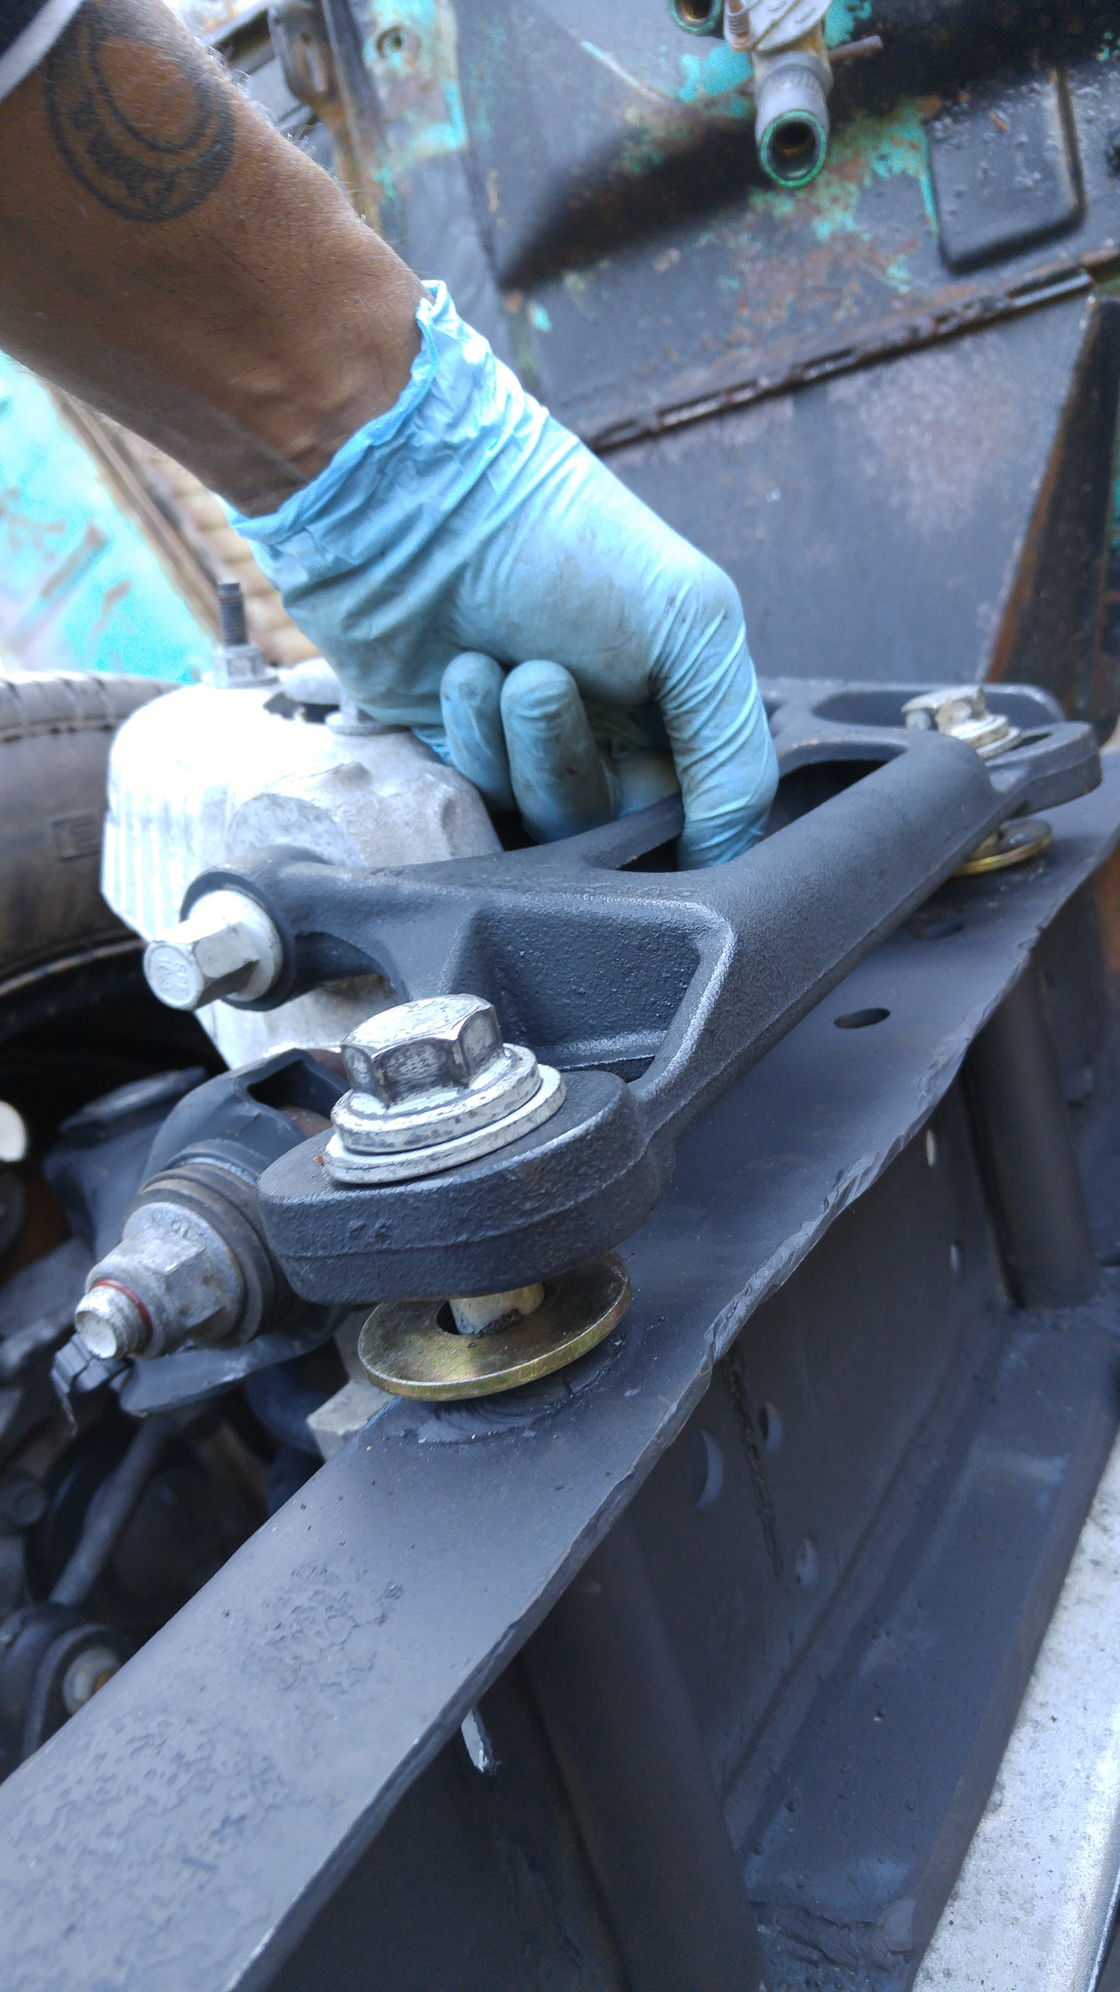
this is the cv to ford 429 motor mounts also from ed ready to rock

80-rotated_bushings_32ec9813ddb1760b3b9e080953b125ab3ed19de3.jpg


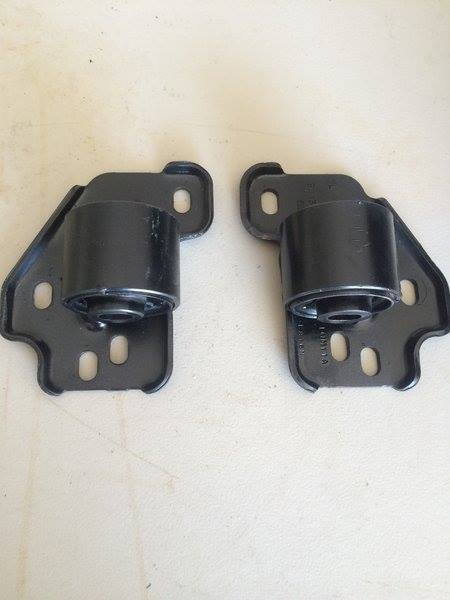
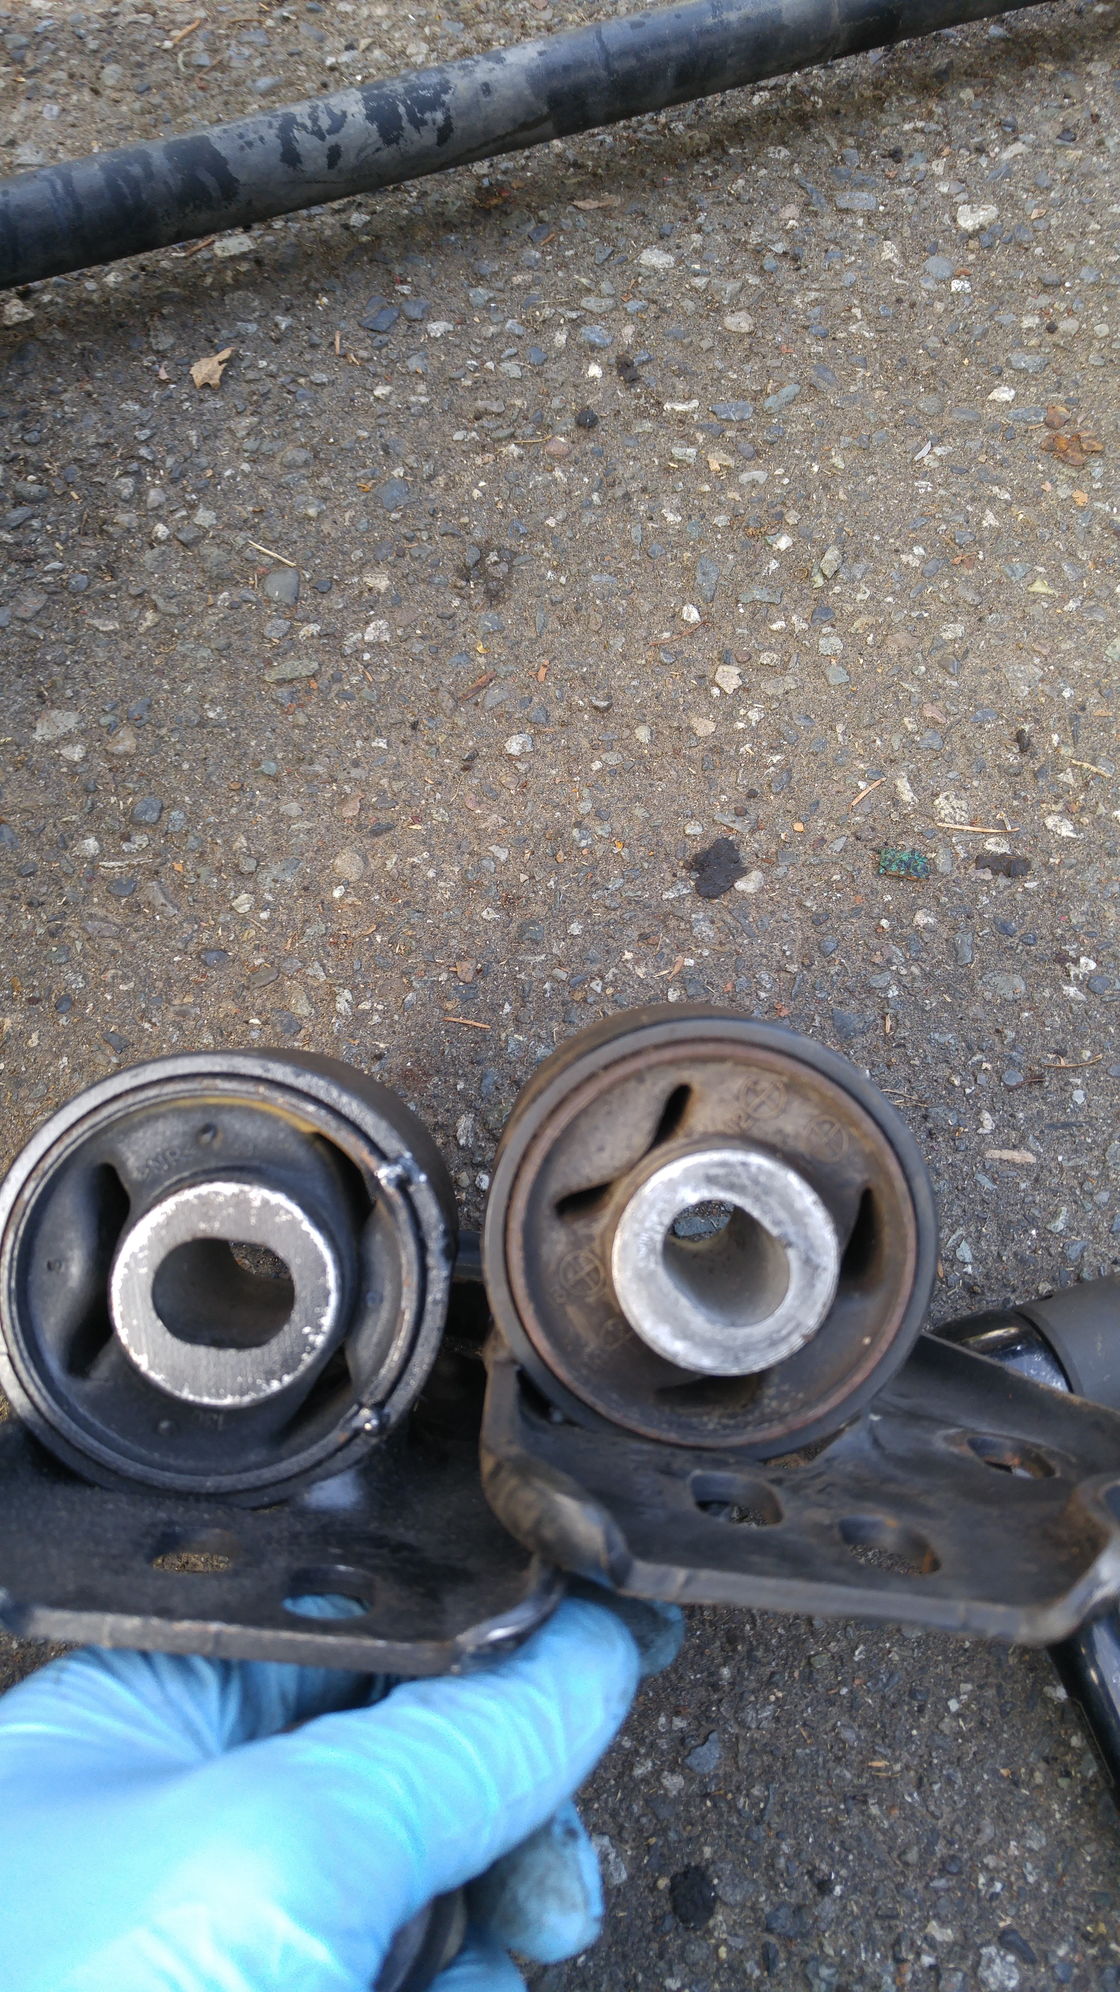
here are the trailing arm bushings..they have been cut open and rotated for proper alignment adjustablitly.
just rotate the bushing parallel to the base plate

to be cont..

Koomz
 
Last edited:
more progress

So after some leveling and plumb bobbing and marking the centerline out came the old ibeams ..gonna be a sweet drop getting more excited everyday of progress:-jammin
made sure to measure measure measure with mutiplie devices
so next cut out the crossmember
so I was told to have the frame level side to side and a 1- 3 degree rake to the front before drilling and installing ..why? I dunno so I went with 1 degree
80-leveled_0131a7c7eaa260e628711f0232746d6fa660102f.jpg


80-leveled_2_3d3948ca54aa60a215b4eddf7527eeaa0b89a8a1.jpg


80-plumbed_f761ac7bcd80fb5a3020271913bfe8c821c17a86.jpg


80-ibeams_out_161e6c814a01f52c8f726b5356b22c645da565e1.jpg

next to rip out the cross member
80-vic_placed_for_fun_888a246a83ad270b97f5ab97ab1926b2d30d6f9a.jpg

you can see the huge lowering drop it will net
80-progress_i_beams_out_cb421e9ea12901727e58d411380d45c8a223754b.jpg


Here is the rest of the cross member cut out clean
alignment pins drilled - for those of you wondering from the center of your rad mounting holes to the center of the boss alignments pins is 22 1/8 - 22 3/8 this is what everyone gets there base from..I went with what I plumb bobbed which was 22 1/4 lol right center ..works for me!
crush tubes/spacers drilled - these are 3/4'' ID for the bolts to go through you'll need a a step bit that goes to 1''
axle mounted ready to burn in some welds :)
so far a total of 20 hours and couple of busted knuckles lol


80-frames_cut_97c9e9b2dcf4b7c260785781b6e79a6430b0961d.jpg


80-crush_tubes_2_39e862e7fa3072101a7beadc4b62ca7c83d34933.jpg


80-front_shot_on_weight_99eb9a681386159d54e3c9f116037f57e39a72ff.jpg


80-boxing_plates_26ee52fec55111148b93a2c330bd4ec169594845.jpg


80-side_shot_on_weight_a927468f9cd9a5a1704b2a3c8514d9664f88c229.jpg


80-do_rear_flip_kit_c1d5f47b1ace404afd5f658c52961e249487ad68.jpg


So just waiting on the rear flip kit and ill get that on there ..c notch the rear frame then weld everything up at once and hit it all with por 15

to be cont....
Koomz
 
Last edited:
Great photo essay and good looking truck. In essence it is just like installing a Mustang 11 front crossmember in any stock frame. Good workmanship in my view. Thanks for taking the time.
 
Great photo essay and good looking truck. In essence it is just like installing a Mustang 11 front crossmember in any stock frame. Good workmanship in my view. Thanks for taking the time.

Cheers thanks for the kind words! Truth be told, it's because of other write ups and time taken by others that I finally took on this build so hopefully it helps someone else one day .
I did consider the mustang swap but its was half the cost to me to scoop the cv front end.
 
Neat truck and that swap will sure make it more driveable. My friend has a 66 with lowered I-beams but it would be nice to add power steering to it at least but there's not much room to add it.

Sheldon
 
Neat truck and that swap will sure make it more driveable. My friend has a 66 with lowered I-beams but it would be nice to add power steering to it at least but there's not much room to add it.

Sheldon

hey thanks Sheldon ..I did consider dream beams but they are spendy!!
all your friend needs is

'67-'79 steering box

'67-'72 steering column

PS pump and bracket appropriate for your engine

PS column firewall mounting bracket and rubber boot

steering linkage (everything between the steering box and the wheel spindle steering arm)

So a saturdays worth of work maybe a bit of sunday too LOL and your boy is one finger steering!
 
I think the Crown Vic is far superior to the M11, especially for a relatively heavy truck. I'll get my friend to check your work out, using real Ford parts it will be easy to convince him to go this way I reckon. It will be interesting to see the final ride height.

Sheldon
 
Nice job and excellent job on taking the pictures.
Thank You for thinking of others enough to post.
S.L :)
Thank you for having a read! appreciate it alot.

I think the Crown Vic is far superior to the M11, especially for a relatively heavy truck. I'll get my friend to check your work out, using real Ford parts it will be easy to convince him to go this way I reckon. It will be interesting to see the final ride height.

Sheldon

Thanks ya interested to see what he has to say? Im pretty excited to see ride height aswell. it supposed to be 5 inches lower and sure seems so.

Great progress, and welcome aboard!

Cheers Big M thank you!

you mentioned you are using a kit to put this in? do you have a link?

sure do here you go http://ritcheytrucksuspension.com/products


just finished pressure washing her top to bottom ..cant wait to weld up some stuff.
 
I think the Crown Vic is far superior to the M11, especially for a relatively heavy truck. I'll get my friend to check your work out, using real Ford parts it will be easy to convince him to go this way I reckon. It will be interesting to see the final ride height.

Sheldon

The only real drawback is that you're limited to running positive offset wheels, but lots of guys just run late-model Mustang stuff (see Josh's 61 F100 build thread) so it's not like wheels are hard to find. You just might run into clearance issues if you try to run something with a lot of dish to it.
 
The only real drawback is that you're limited to running positive offset wheels, but lots of guys just run late-model Mustang stuff (see Josh's 61 F100 build thread) so it's not like wheels are hard to find. You just might run into clearance issues if you try to run something with a lot of dish to it.
agreed I do like the stang wheels..Josh's f100 stands perfect too but Im still hooked on steelies..so skinnies up front and some deep dish in the rear with some phat white walls

is it just me ordid all the pics disappear:confused:

they are still showing for me?
 
...damn slick build and thanks for all the detail -it could be a text book for others considering this swap....
 
welcome aboard and thanks for the photo essay.

The Crown Vic swap is fast becoming popular as they are readily available in the salvage yards.
 
...damn slick build and thanks for all the detail -it could be a text book for others considering this swap....

wow thanks I appreciate that! its the only way to learn...from others.
welcome aboard and thanks for the photo essay.

The Crown Vic swap is fast becoming popular as they are readily available in the salvage yards.

I agree cheap enough to just get the whole car and use the motor trans and have ac if you wanted ..crazy lol
 
sick progress

Well I got a lot more done today

got the crush tubes burned into place


80-samsung_008_0866e898ad262133084a9f82feaa7a3284f87198.jpg


So here's where I guess my methods I speak off kick in ..the holes for the bolts are drilled so crush tubes welded in and everything centered..
so I decided to really box it in and then fill the holes from the outside later as well.


80-samsung_010_7c474a175029d1e9566ef877e96533516bd54e39.jpg


80-samsung_014_bcc88564a562433e458b2db1aadffd392bfe173d.jpg


80-samsung_012_0e90b6d3002a1eb58a6ec3a08cdcd301750382d6.jpg


tagged with some weld through primer for now need some more boxing plates

80-samsung_014_5c9113059a11abe0ccd6b8b9691bba6b0dbef09c.jpg


so with the bottom plated and crush tubes all set etc etc up no need for the boss pins anymore chopped em off
alot off guys do this in the beginning but I just personally felt safer about squaring up the ifs by drilling the holes and using them for mock up


80-samsung_015_690249a6d0b20b407390163f3ac121abfd672fe8.jpg


so ifs is in time to bolt it up with some washers to finish it off

80-samsung_016_2cee90c15fde3a420e4059a9a1b5537bc4d23de0.jpg


now that its all bolted up I started mock up on the trailing arm plates and burned in the gussets made sure tools would clear

80-samsung_003_ff45735d2f9c82903a0cebacd175753393ec251b.jpg


plates and rotated bushings

80-samsung_004_c401f204d9c82ea42bf367e4b3bbc4f919f9f3e7.jpg


rotated bushing on the left factory on right

80-samsung_024_30eda32f65a7150b27b1bcca42608da0798f81c7.jpg


gussets and trailing arm plates all welded up

80-samsung_023_eae8a447dd8671e361a308e20d6f81f2188d0038.jpg


a little splatter but Ill clean it up Its definitely not going anywhere though

80-samsung_026_832d55fb793c153b23067bec229926d49cc25d9f.jpg


looking good so far, next to do is drill out the back sway bar bolts and box in the frame

80-samsung_022_ef88e52a0e75bdeb99f46be9bc3a45ce57969a8d.jpg


rear shot undid the leafs to get a better stance happening for now once the front is done Ill get to the leaf packs and axle flip

80-samsung_027_80849cd7e6d01a6c6de37cb8b7bb63d683b48978.jpg


80-samsung_021_5fee8df2583dd393848e633bad96b8936bfcad06.jpg


well thats it for today
 
Last edited:
Good looking welds, I don't think you're much of a "hack". That's a good looking swap. It looks like a Dana 60 in the rear. I love finding those as they quite often have a powerlock with thrust button, I like those better for narrowing than the floating axles ones.

Sheldon
 
Good looking welds, I don't think you're much of a "hack". That's a good looking swap. It looks like a Dana 60 in the rear. I love finding those as they quite often have a powerlock with thrust button, I like those better for narrowing than the floating axles ones.

Sheldon

hey thanks Sheldon. I appreciate that! I was told its a d60 yes ..Im torn and pondering to swap in a 8.8 for disc or get a disc brake kit for the 60 and redrilling for 5x 4.5

*edit it is stamped 60 ..leaking horribly from everywhere ..going with a 8.8
 
Last edited: