
Navigation
Install the app
How to install the app on iOS
Follow along with the video below to see how to install our site as a web app on your home screen.

Note: This feature currently requires accessing the site using the built-in Safari browser.
More options
You are using an out of date browser. It may not display this or other websites correctly.
You should upgrade or use an alternative browser.
You should upgrade or use an alternative browser.
1962 Mercury Unibody Pickup Project
- Thread starter The Big M
- Start date
The Big M
Active Member
I actually lucked out in that a friend saw a fairly complete truck in a wrecking yard and was able to get the full set of letters for something like $20 before the truck got crushed. The opposite side of the spectrum looks like this:
http://www.slick60s.com/viewtopic.php?f=6&t=34468
I also saw a set among some assorted trim and emblems at the last Red Deer swap I was at but it was missing the 'E', as mine was originally. Can't remember what the seller was asking but I don't think it was outrageous.
They are fairly rare though, as I don't believe the font is shared with any other models. In fact, they may only be specific to the '62 through '64 trucks. The '61 had yet another font and the letters were mounted in the grille itself rather than on the upper valance.
Last edited:
The Big M
Active Member
Haven't update this for a while, so here we go!
Regarding the "what have you drug home this year" thread, I relocated my truck yet again. One of the major sticking points for this project has been finding the time to get my workspace organized. That didn't happen this spring or summer as my wife and I made the decision to finish up our house renos, list the house, and pull the trigger on a move out of the city!
My initial plan for the narrow double garage was this, which never came to fruition given the move:
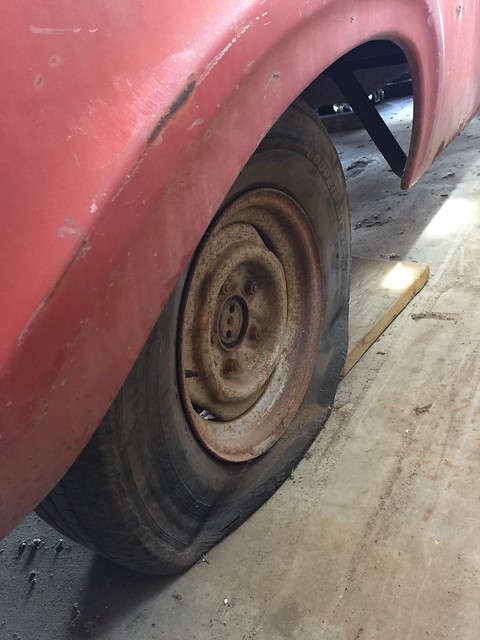
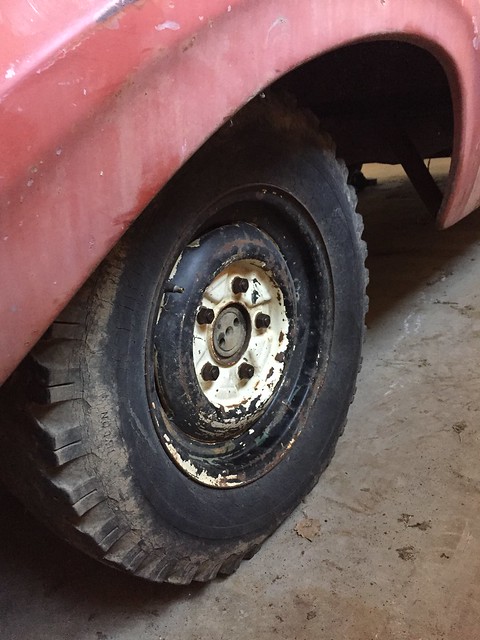
In reality the truck was jammed against the wall the entire time we resided in Calgary, so my major accomplishment was finally getting a rear tire installed that held air (for more than a handful of seconds at least), which made loading it on the trailer much easier.
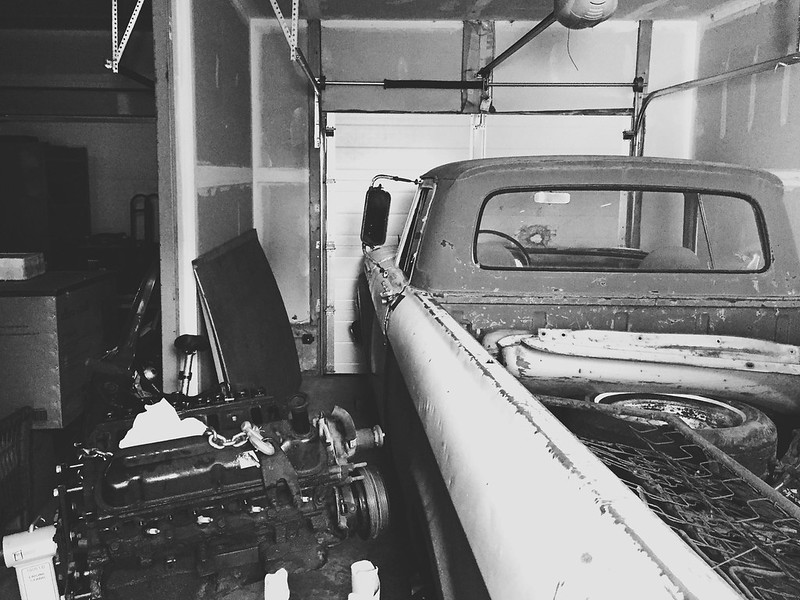
And here she is tucked in to her new home. Our realtor found it funny that I came to all of our viewings armed with a tape measure, but a shallow garage just wasn't going to cut it! I would have liked a little bit more depth in this bay, but a 12' x 22'8" footprint leaves a decent amount of room to walk all around the truck. The 8' wide x 7' high door made life interesting when unloading, but we managed to get it rolled off without clipping any of the stonework on the exterior of the garage.
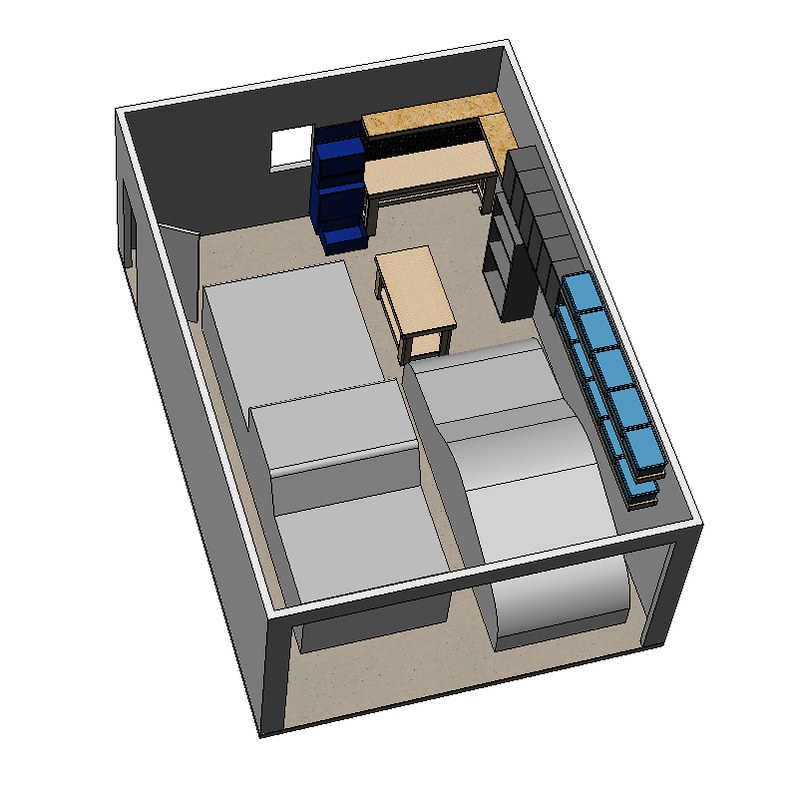
And the new plan for the attached triple garage:
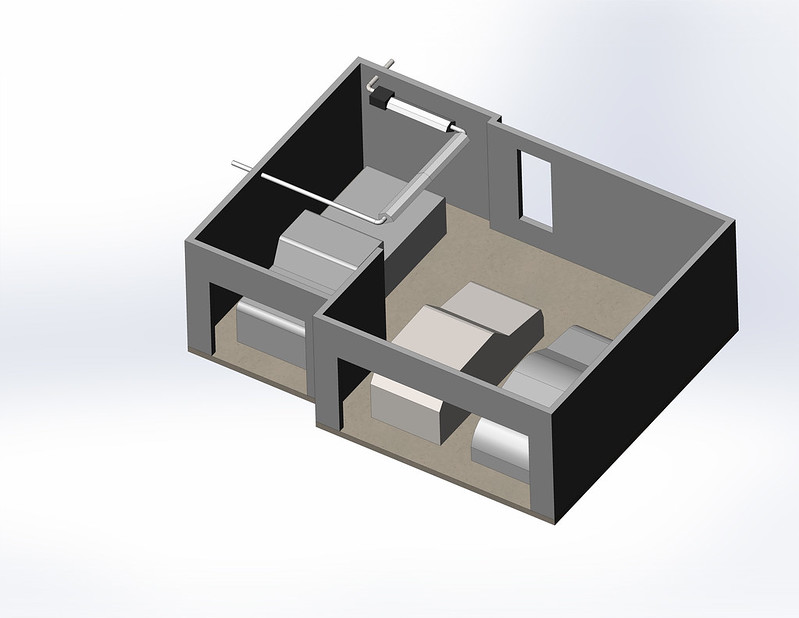
The next orders of business will be clearing out the middle bay to accommodate the daily driver, getting some electrical work done (subpanel plus a bunch of additional lighting, 220V outlets, etc.), getting a heater installed (something like what I've sketched in above), and planning out where my workspace will be and tool storage will look like.")
Regarding the "what have you drug home this year" thread, I relocated my truck yet again. One of the major sticking points for this project has been finding the time to get my workspace organized. That didn't happen this spring or summer as my wife and I made the decision to finish up our house renos, list the house, and pull the trigger on a move out of the city!
My initial plan for the narrow double garage was this, which never came to fruition given the move:
In reality the truck was jammed against the wall the entire time we resided in Calgary, so my major accomplishment was finally getting a rear tire installed that held air (for more than a handful of seconds at least), which made loading it on the trailer much easier.
And here she is tucked in to her new home. Our realtor found it funny that I came to all of our viewings armed with a tape measure, but a shallow garage just wasn't going to cut it! I would have liked a little bit more depth in this bay, but a 12' x 22'8" footprint leaves a decent amount of room to walk all around the truck. The 8' wide x 7' high door made life interesting when unloading, but we managed to get it rolled off without clipping any of the stonework on the exterior of the garage.
And the new plan for the attached triple garage:
The next orders of business will be clearing out the middle bay to accommodate the daily driver, getting some electrical work done (subpanel plus a bunch of additional lighting, 220V outlets, etc.), getting a heater installed (something like what I've sketched in above), and planning out where my workspace will be and tool storage will look like.
Last edited:
Haven't update this for a while, so here we go!
Regarding the "what have you drug home this year" thread, I relocated my truck yet again. One of the major sticking points for this project has been finding the time to get my workspace organized. That didn't happen this spring or summer as my wife and I made the decision to finish up our house renos, list the house, and pull the trigger on a move out of the city!
My initial plan for the narrow double garage was this, which never came to fruition given the move:
In reality the truck was jammed against the wall the entire time we resided in Calgary, so my major accomplishment was finally getting a rear tire installed that held air (for more than a handful of seconds at least), which made loading it on the trailer much easier.
And here she is tucked in to her new home. Our realtor found it funny that I came to all of our viewings armed with a tape measure, but a shallow garage just wasn't going to cut it! I would have liked a little bit more depth in this bay, but a 12' x 22'8" footprint leaves a decent amount of room to walk all around the truck. The 8' wide x 7' high door made life interesting when unloading, but we managed to get it rolled off without clipping any of the stonework on the exterior of the garage.
And the new plan for the attached triple garage:
The next orders of business will be clearing out the middle bay to accommodate the daily driver, getting some electrical work done (subpanel plus a bunch of additional lighting, 220V outlets, etc.), getting a heater installed (something like what I've sketched in above), and planning out where my workspace will be and tool storage will look like.
Looks like you've got a bay for the truck, and a double garage bay next to it. I know you mentioned cleaning out the centre bay for the DD, but I'd suggest putting the DD on the far right side.
That way you can have your tools/bench close to the truck and you won't have to walk or work around the DD. I'd be worried about knocking something over onto the DD if it was in the middle. Just a thought.
The Big M
Active Member
Thanks for the comments everyone.
30sx: For some reason the dimensions are never included in the listing! Just the poorly defined "oversize", lol.
Speedy Canuck: The arrangement I have shown here is truck, DD, and summer-only car (which I am more worried about dinging up, lol) from left to right. So I really need a 3-use arrangement, where I have space to work on a project, store a summer car, and park a DD (although the last one isn't all that critical as there is plenty of room on the driveway).
The advantage with this setup would be I could back the DD out and gain some extra floor space when needed. I thought about having the truck on the far right since that bay is actually longer, and having the summer car in the single bay. I may shuffle things about yet.
Scotty: I moved my truck closer to it's original home, going south and east.
Digger_Dave
Well-Known Member
Tight space ..
And I thought my shop was a tight squeeze !
And I thought my shop was a tight squeeze !
And I thought my shop was a tight squeeze !
Come see what small space I have to build in..lol
BigM, looks like a nice shop you have planned out!
The Big M
Active Member
I ended up going a different route, but finally got a heater put in the garage:
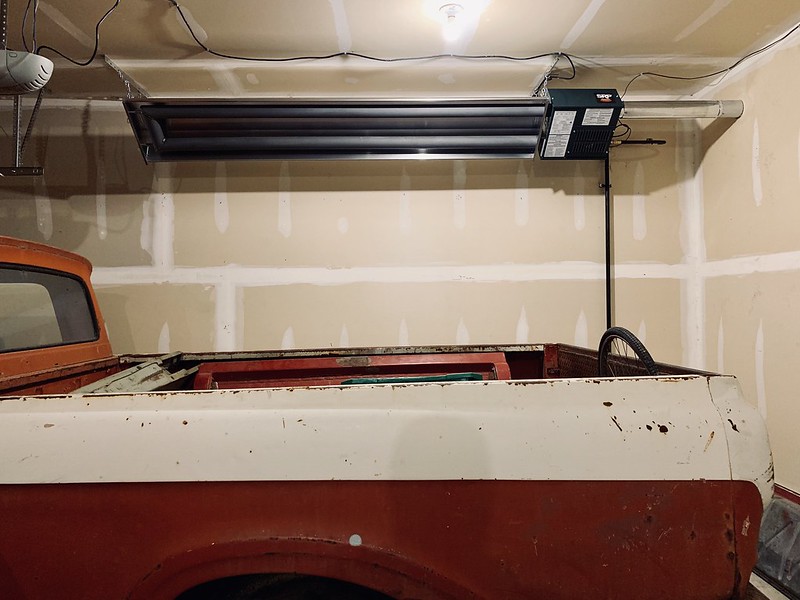
This is the Superior Radiant GR series, which outputs 45,000 BTU out of a 10 foot overall length. It has a concentric intake/vent pipe which means only one hole had to be cut, rather than one inlet and one outlet. Super clean install, and puts out a good amount of heat. Not the ideal setup as it's the opposite wall from where the toolboxes ended up, but given the challenges with differing roof heights I think this will work just fine, and ended up being a reasonable price.
I keep it at a nice stable 5 deg C all the time, then crank it up when I'm outside working. It climbs from 5 to 10 deg C in less than 30 minutes so not too bad at all.
I had to push the truck halfway out the door so the contractors had space to work, then push it back in manually which SUCKED but all in all a great result!
Jason: I wouldn't sweat even a little bit how "topographical" your drywall may be, painting it will lighten up the space, AND it will be much easier to wipe off any splashes/spills, etc, as opposed to what happens with the bare paper finish on the drywall.
HA! m-blem, that's perfect, because it's an M, and it's definitely a BLEM
James
HA! m-blem, that's perfect, because it's an M, and it's definitely a BLEM
James
The Big M
Active Member
True enough, James. The issue is the time involved to actually coat that much surface area, including moving everything out. I'd actually love to go with something more industrial like corrugated steel panels, but this is fine for now.
One other development from a while ago was this beauty, with the roller base to match:

One other development from a while ago was this beauty, with the roller base to match:
HairyCanary
New Member
Did you finish the M-100 project? I'm interested to see what became of it.
Dave
Dave
The Big M
Active Member
This project actually remains in a perpetual state of getting started, so not much to report. I did do some garage reorganization, adding a set of tire racks, making use of some shelves I had sitting around, setting up a bit of a charging station for the power tools, and generally shifting stuff around.
Next I’ll have to do a more thorough inventory of parts to get a better handle on what I have laying around, then work out some simple tasks that I can tackle first. I was thinking I may start with getting the ‘96 bench seat mounted to the ‘62 seat rails, and getting the rad and fuel tank steam cleaned, leak checked and sealed up.
Next I’ll have to do a more thorough inventory of parts to get a better handle on what I have laying around, then work out some simple tasks that I can tackle first. I was thinking I may start with getting the ‘96 bench seat mounted to the ‘62 seat rails, and getting the rad and fuel tank steam cleaned, leak checked and sealed up.
Hi the big M: I was looking through your build and it reminds me a lot of mine. My truck was very close to yours in condition and where I found rusted areas. Toughest part was to find a good tailgate (most looked like a U). I went a little different route on what I ended up with but did have a specific purpose/use in mind. I am new to the forum and very new to photo share stuff so hopefully this link will work to see my outcome? Still have to ask for help on getting the actual picture to display on the site. I believe these unibody's are getting very rare so keep up the restoration, looks good so far.
Bob

https://imgur.com/a/EjrpMUC
Bob
https://imgur.com/a/EjrpMUC
Last edited:
Hi the big M: I was looking through your build and it reminds me a lot of mine. My truck was very close to yours in condition and where I found rusted areas. Toughest part was to find a good tailgate (most looked like a U). I went a little different route on what I ended up with but did have a specific purpose/use in mind. I am new to the forum and very new to photo share stuff so hopefully this link will work to see my outcome? Still have to ask for help on getting the actual picture to display on the site. I believe these unibody's are getting very rare so keep up the restoration, looks good so far.
Bob
https://imgur.com/a/EjrpMUC
First, welcome to the friendly group here. Hope you enjoy the banter.
For posting photos your most of the way there as you are using Imgur. There's a thread below on using Imgur to post photos. Or basically if you copy the image address then select the "insert image" menu button here and paste the image address into the box, your done. From Imgur if you highlight your thumbnails that you want to post and select "view image info" and "generate image links" and "done" you'll get a box showing the link addresses. Select the link type BBCode and the Image size you want and then Copy the list of links and paste directly into your post editor here (no need to use the "insert image" button. When I upload my photos to Imgure I use the auto-resize feature to set them all to 800 pixels wide. Then when I post them here I use the original image size. Hope this helps.


BTW, I like those Moon Discs. Any chance they're 16" and if so, where did you get them?
Last edited:
Did you finish the M-100 project? I'm interested to see what became of it.
Dave
Hello and Welcome to the CR Forum Dave.
Do you actually own the "Harry Canary" Willys pick up.?
Thanks GFart: I think I get what you are telling me. Will try another shot at pictures soon, maybe more info on the truck. Yes, do enjoy the banter, car guys are car guys no matter the forum. I usually learn something new as well.
Moon discs - no, sorry old school 15". When I built the truck because the purpose was to tow the 5th wheel trailer I was scared to go with aluminum rims so these are steel GM rally wheels (5x5 bolt pattern like some of the big Lincoln stuff). Also we were able to cut and get the backspace we needed on the front to clear the fenders. Lincolns had a very wide stance back then and so does the unibody!
Moon discs - no, sorry old school 15". When I built the truck because the purpose was to tow the 5th wheel trailer I was scared to go with aluminum rims so these are steel GM rally wheels (5x5 bolt pattern like some of the big Lincoln stuff). Also we were able to cut and get the backspace we needed on the front to clear the fenders. Lincolns had a very wide stance back then and so does the unibody!