| 1961 PV544 Project - Update 25 |
Body & Paint - The Process Begins By Frank Colgoni There was a time when I thought that the body and paint on the car, while 30 years old, could be serviceable and would do in the short term. I knew that there were a few holes in the floor that needed attention and there were some old repairs (again, 30 years old) that were shaky at best. These, however, could all be rectified by attacking the floors and the underside. As the hood and nose section were off of different cars (used and new old stock respectively), they, at least, would have to be painted. After considerable consideration of the pros and cons and subsequent conversations with Monty Gilchrist of Cruisin' Creations (also about the pros and cons), I decided to bite the proverbial bullet and take the car down to bare metal to see what evil lurked. More on that in sunsequent updates. |
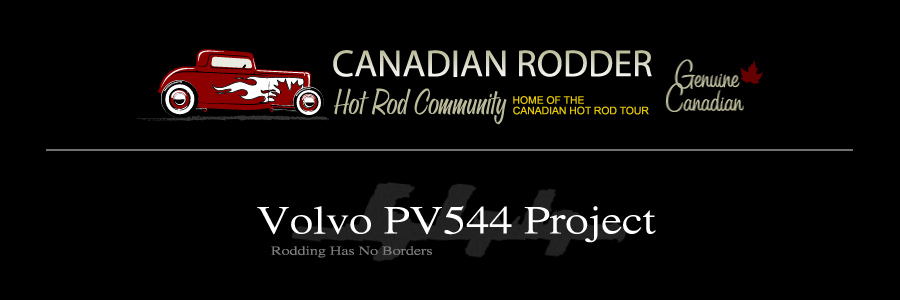
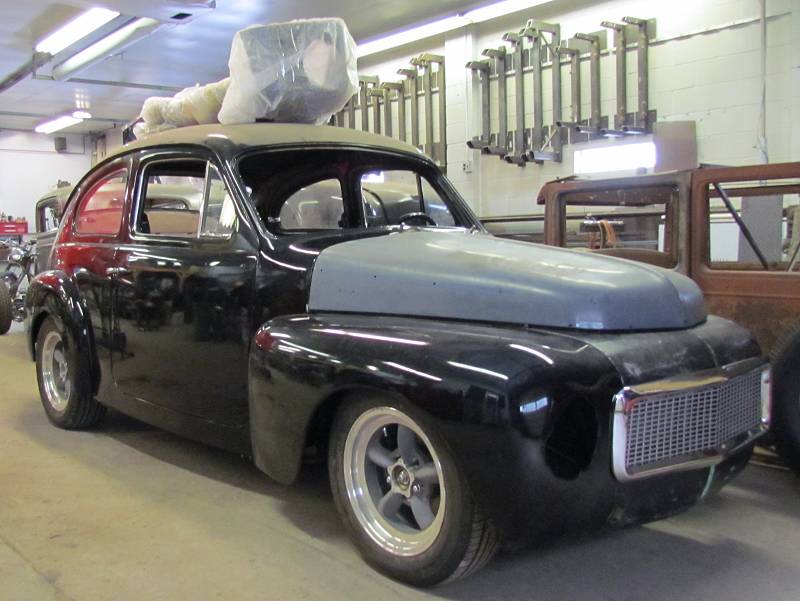
Below (two photos): Ready to be moved to Cruisin' Creations. The fenders, hood and nose section were loosely attached for transport. When we took ownership of the car, only the doors and trunk lid were hung. The new-old-stock fenders (also painted) were wrapped and likely had been that way since they were painted. There was no way of knowing whether they had been properly fitted "way back when". While the doors latched properly, the gaps were quite bad - especially at the bottom. The trunk clearly needed adjustment/attention in various spots.
|
 |
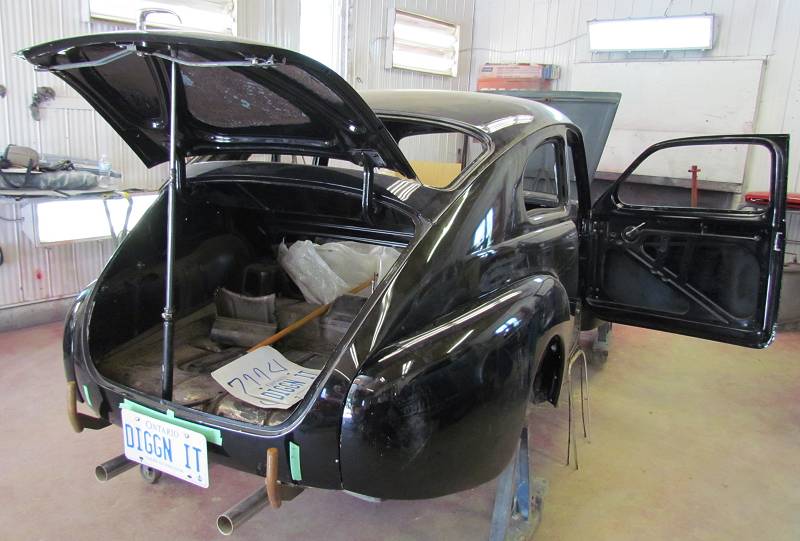
Below: Now at Cruisin' Creations, some disassembly began. That is, trunk lid, doors, rear fenders, exhaust system and nerf bars. The front fenders, nose section and hood were left in place as a prelimary fitment was planned.
|
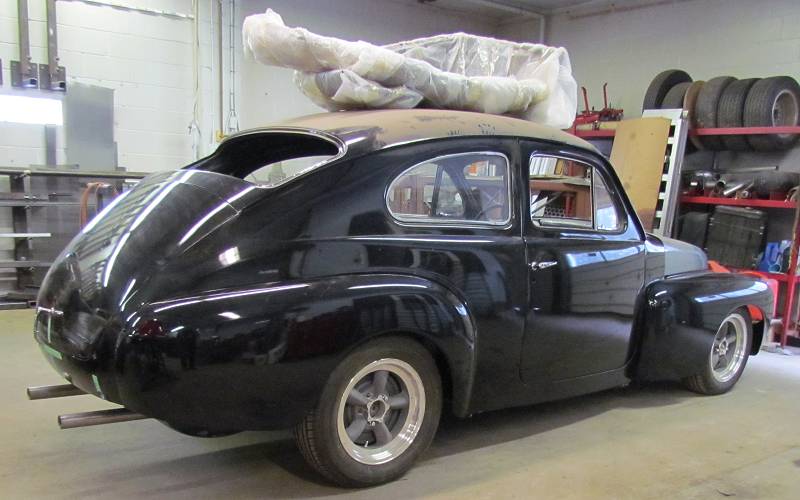
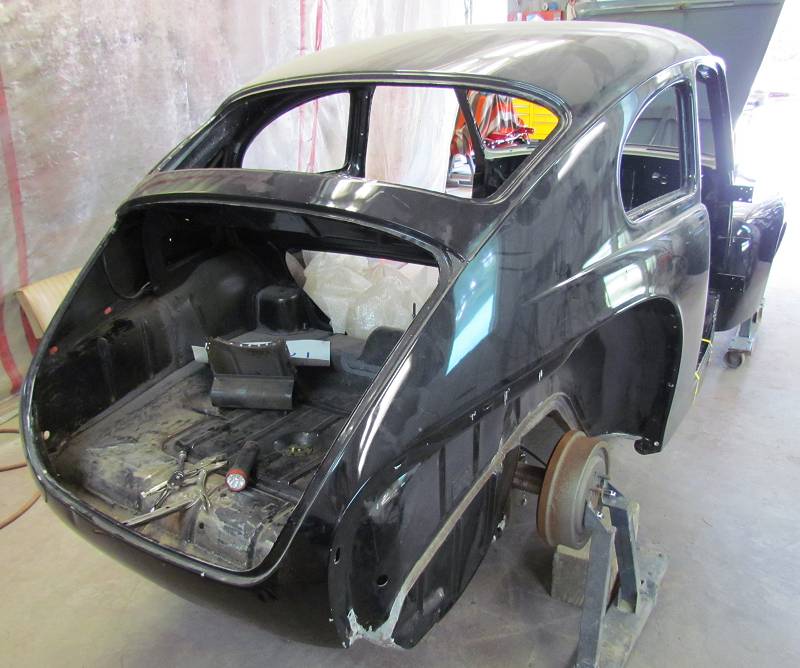
Below (two photos): After initial disassembly.
|
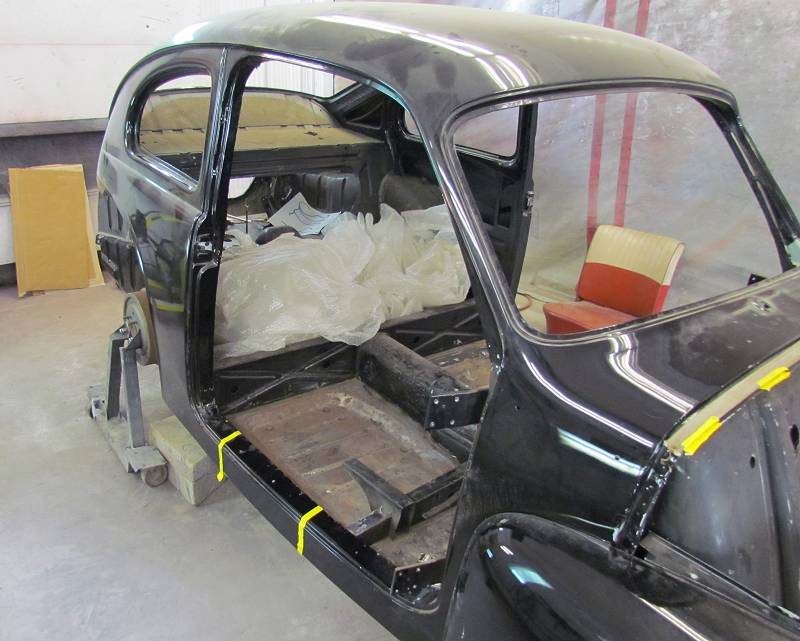 |
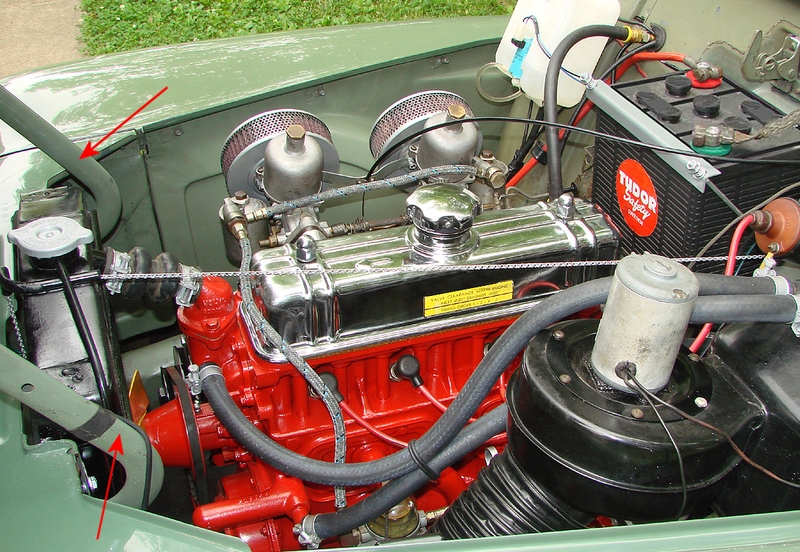
Before moving on to our work, a few details about hoods, hinges and nose sections for early and later Volvo PV544s. Immediately below: You'll notice that the hood hinges (red arrows) swing into the engine compartment along each side of the radiator. This is the configuration for cars up to 1961 like ours. In the photo that follows: You'll notice that the hood hinges (red arrows again) swing into the nose section in front of the radiator. This is the configuration for cars from 1962 through 1965. Volvo made this change when they increased engine displacement and simultaneously made the radiator wider. Because we wanted a wider radiator, our early nose section was swapped for the later version. Why am I telling you this? Read on.
|
 |
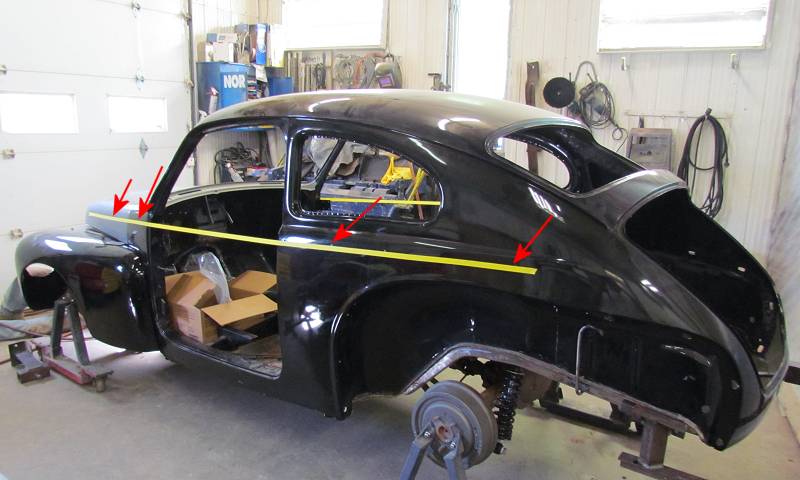
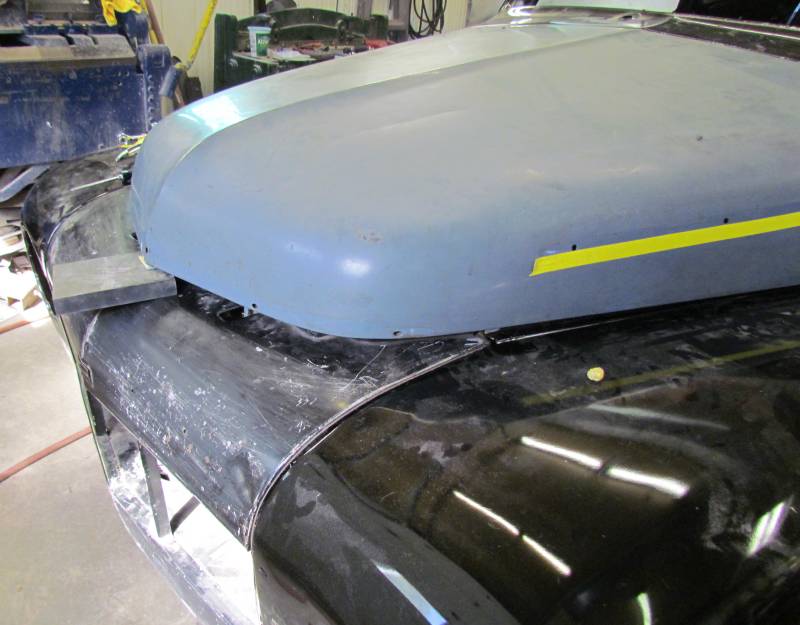
So, after the initial stripdown, Norbert (of Cruisin Creations) and I decided to do an initial test fitting of the front end body components: inner fenders, fender, nose and hood. After snugging things up properly, our first observation was that the gap of the hood at the cowl was extreme and that the entire front end, when viewed from the side seemed to droop. To check this, I added masking tape to the side of the car using the trim clip holes as a guide. With the tape in place it confirmed that things were going downhill so-to-speak. Below: We left the fenders and nose where they were but lifted the front of the hood with various thicknesses of shims until the tape line appeared straight. Red arrows below point to trim clip holes.
|
Some further details about the front body sections: The nose section rests on and is fastened to the framerail spreader bar. The fenders bolts to the nose section at their front and to the unibody at their rear. Ultimately, the height of the entire front end, including the hood, is determined by the height of the nose. Below: This is how much we had to shim the front of the hood to achieve a straight line on our tape. The question then became why. The solution of our problem? It turns out that the radiator cradle in the later noses (the one we switched to), while wider, is shallower - in fact, by the exact amount of the shim shown in the photo below. As the spreader bar is in the correct position, the permanent resolution was to add a spacer between the radiator cradle and the spreader bar mounting flange (see second photo below).
|
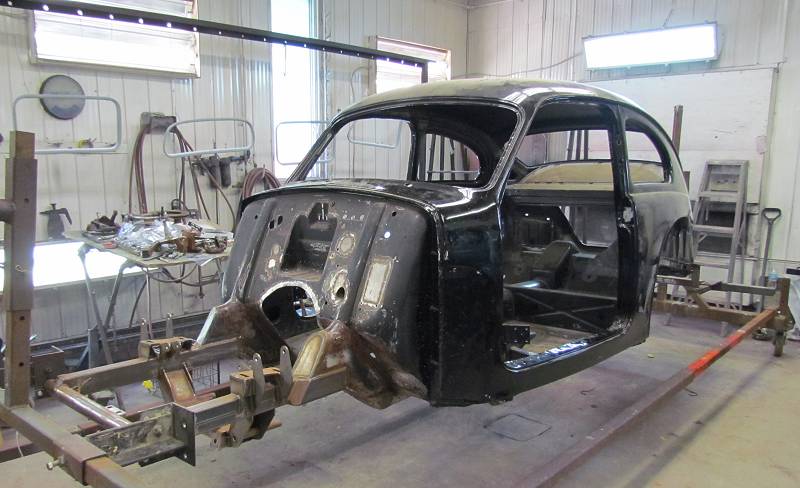
Below: With the front end preliminary fitment complete, the balance of the strip down continued. Here, we're getting ready to lift the engine and transmission out.
|
Below: Completely stripped and mounted to the rotisserie.
|
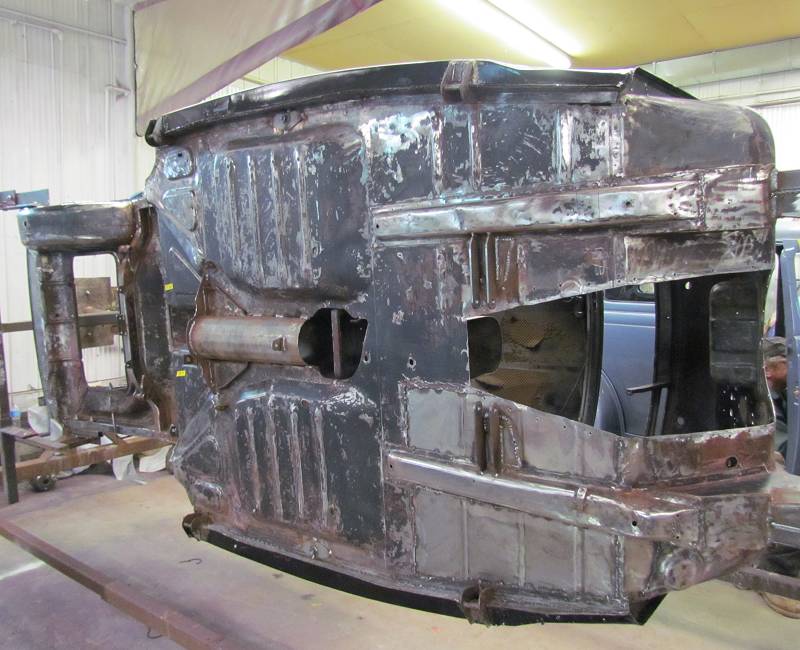
Below: The underside. If you've read Update 7 (if not, click HERE), you see what state the floor was in when we received the car and how it got to this point. Areas that need attention: Previous repair to driver's floor, both floor/frame rail structural members are caved in, hole in passenger front floor, rust around jacking points, poor repairs to inner rockers, rear trunk pan, uneeded holes.
|
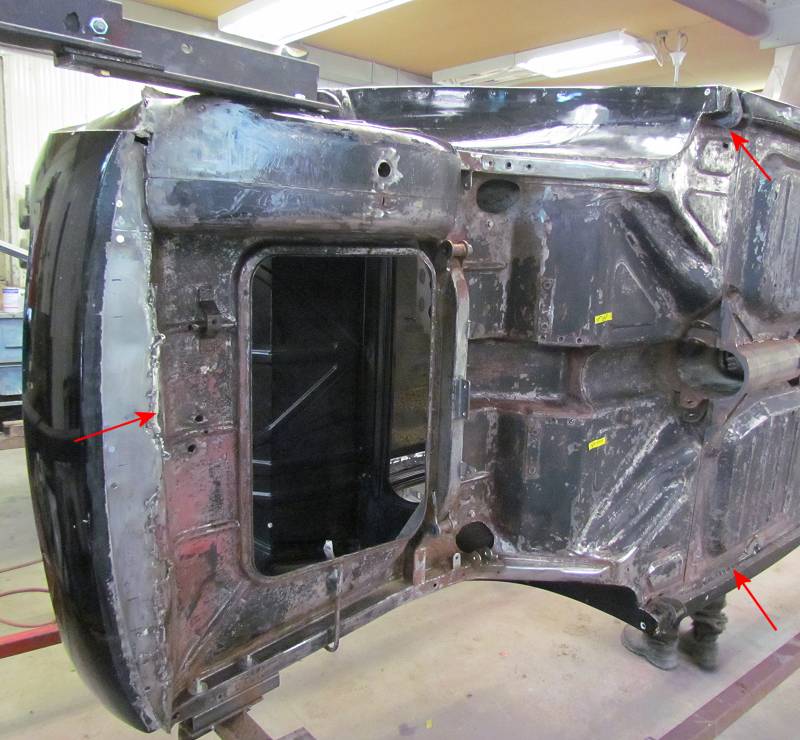
Below: Red arrow in upper right point to a jacking point. All four of these will be removed. Arrow at bottom right points to a previous repair to inner rocker(s). These will be redone. The arrow at left points to a trunk pan repair that needs attention and cleaning up.
|

Resources:
Cruisin' Creations
Next: Blasting the body