| 1961 PV544 Project - Update 21 |
Dash / Gauge Insert By Frank Colgoni While the original gauge cluster for the PV544 was pretty funky and very "period" with its ribbon speedometer, now that we have changed over to a Borg Warner T5, running the speedometer off that transmission became impossible. So, a ground up solution was called for. The photo immediatley below is the stock setup. The entire cluster slips in (with much difficulty from behind the dash). |
 |
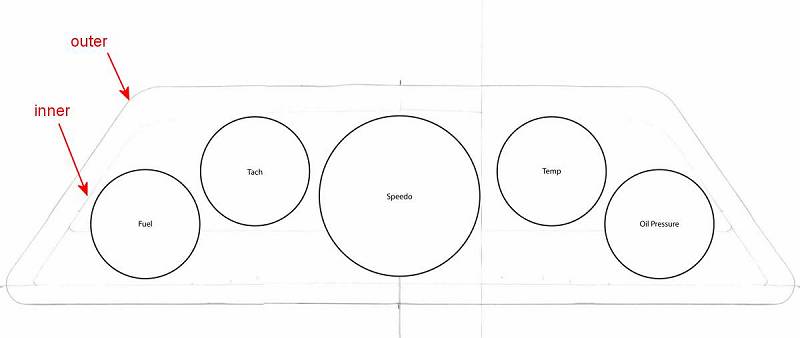
Below: After removing the gauge cluster, an outline of the shape was made on paper. It was then scanned and imported into a drawing software. If you look carefully you will see an inner line also (red arrow points to it). Everything must stay inside that inner line. I then laid out the gauges. As the gauges selected have an optional small tach that is the same size as the fuel, temp and oil pressure gauges, it can be incorporated.
|
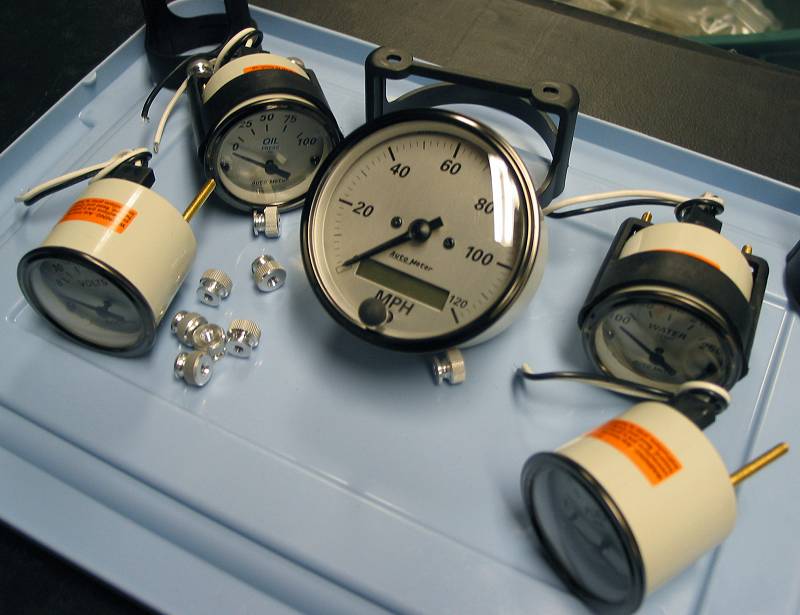
Below: The gauges that will be used
|
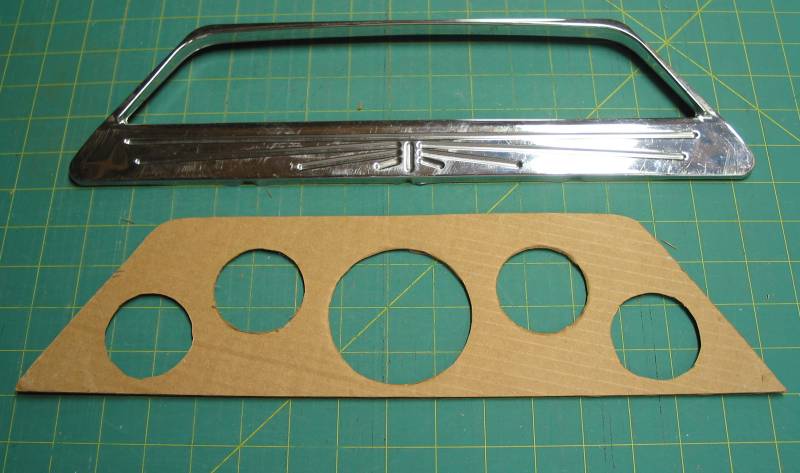
Below: After printing out the layout, I created the cardboard mockup. The stock bezel is shown above it.
|
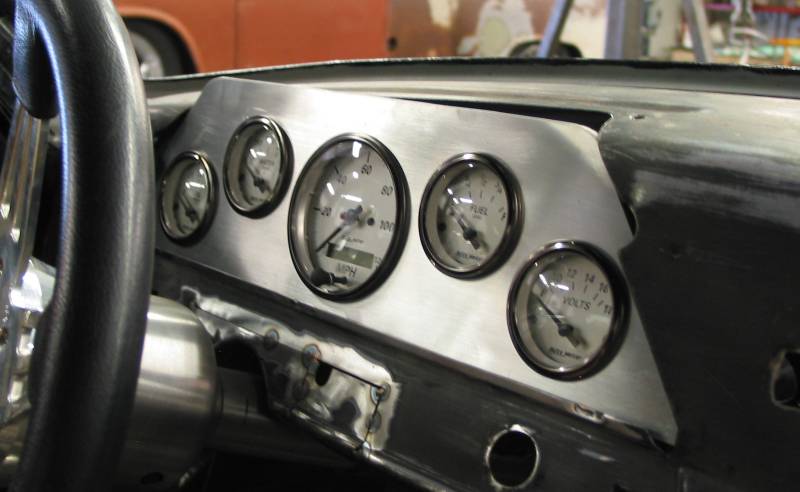
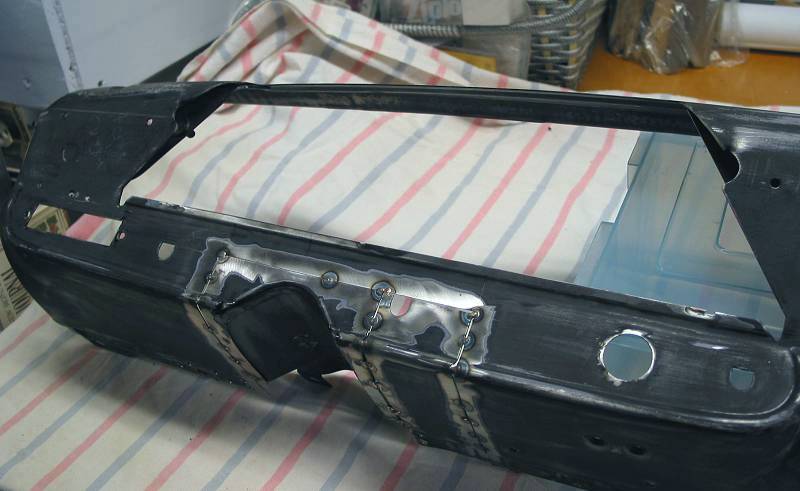
Below: At this point, a 1/4" aluminum version has been made and is slipped into the opening. Note: A dash pad tops the metal dash. See the first photo above. After staring at this for forever (you can relate), two things occurred to me: 1) As the original bezel was not flat but was leaned back slightly where the gauge portion started, this solution would not work as is. 2) With master brake and clutch cylinders behind this area, it would make more sense to have the insert surface mounted so that it could be removed in one piece from the front side. Another reason why the stock cluster wouldn't do. Back to the drawing board so-to-speak.
|
Below: The dash removed from the car.
|
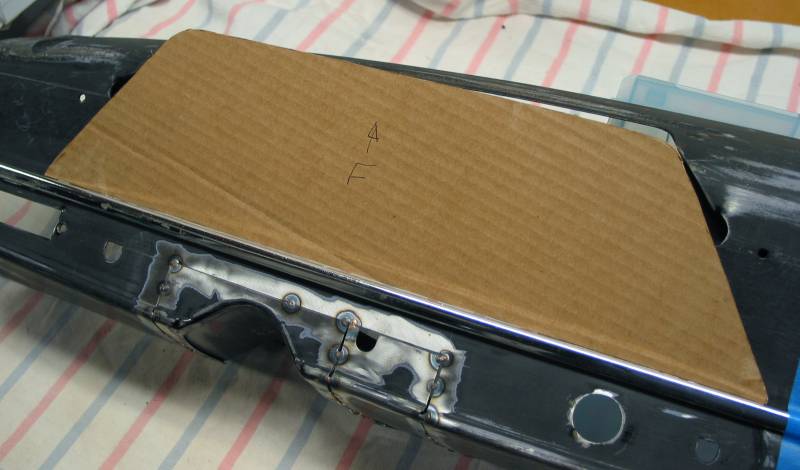
Below: Another working template was made.
|
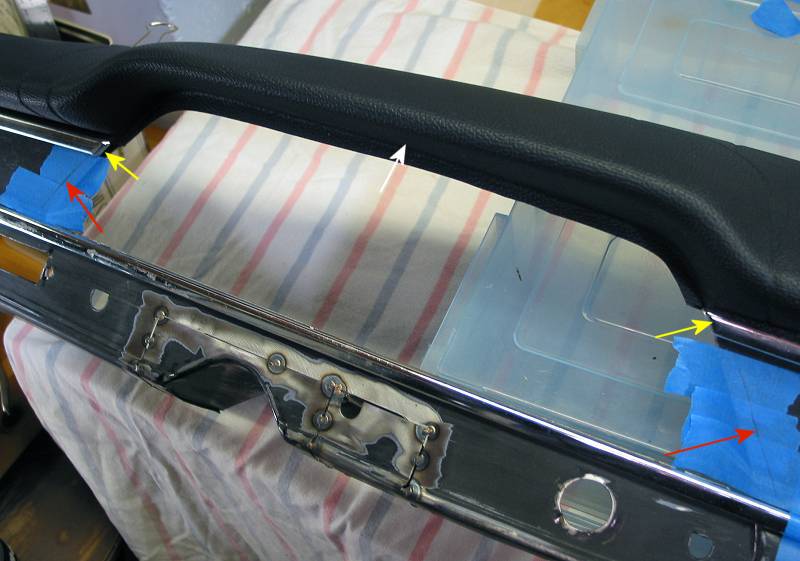
Below: In order to accurately size a surface-mount insert, The dash pad (white arrow), upper trim strips (yellow arrows) and lower trim strip were added. Then masking tape was added to define the opening and the desired overlap (red arrows). You'll notice that the overlap line runs into the upper trim strips.
|
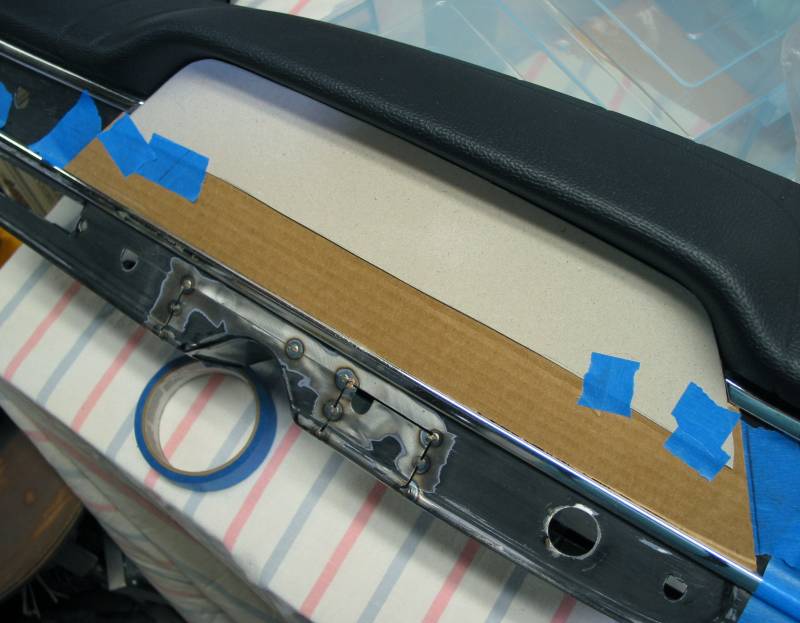
Below: In order to get around the upper trim strips, a new template was created by adding the upper section which accommodates the jog created by the upper trim strips. At this point the overall shape was finessed to match the contour of the dash pad eyebrow and the required overlap.
|
Below: This final shape was transferred to the original aluminum plate after which the excess material was removed by band saw.
|
Below: The dash was reinstalled in the car and the dash pad was trimmed to it final dimensions. It will be glued during final assembly.
|
Below: Tabs extending into the gauge opening were added to the back side of the dash to accept the fasteners in the bottom corners and the shape of the aluminum plate was further finessed by hand with a file. The reason for the large gap in the upper left (red arrow) is because the pad needs to come down to the line indicated by the yellow arrow.
|