
By Al Cook
It came without warning. There were no signs or signals. It jumped right out in front of me and I had no time to stop. Wham! I hit The Wall.
Now if you are thinking I wrecked the coupe, you are wrong. The wall I hit was the wall of progress. Or should I say, lack of progress.
From our last installment we realized everything was moving along just peachy-keen. No huge roadblocks or obstacles to overcome. The chassis separated from the body without event (other than my weakness to not remove it) and the clean-up was well underway. I was even looking forward to installing the Mustang II front suspension.
Well, the front suspension eventually arrived and all efforts were underway to install it. I followed the instructions very carefully and had a few discerning eyes review what I was doing and generally got the nod of approval. I left the final welding task up to a professional; Duke Brown. He welded it in for me in no time flat. Beautiful work too.
Now comes the point of progress. We can now put the car down on the ground, mock-up the upper and lower control arms, install some wheels and tires and see how the car will sit. I can't wait to see what kind of rake this Killer will have.
Some small changes in the original plan came in the form of painted wire wheels. The original plan was to install steelies with wide whites but when I realized the price of wide whites that plan went out the window. However, a better alternative came along with the offering of some genuine 1955 Chrysler Imperial wire wheels and tires from fellow Roadmate, Jeff Norwell. How could I pass them up? These rims are coveted by many rodders and car enthusiasts alike. I'll paint them cream, add some chrome rings and I'll be the talk of the town!
Now for The Wall. For those of you who have done this before you know the alignment of the top hats, front cross member and control arms is critical for the Mustang II IFS. Remember I said I followed the instructions carefully and had some discerning eyes review my work and measurements? Well, that only works if the instructions are accurate and clear. In my particular case they weren't. Or maybe it was my interpretation.
Installation of the front springs was a disaster! The spring wouldn't sit in the seat properly and had a serious bow from fore to aft. Even I knew this wasn't correct and I am an amateur. I have been working on the coupe for almost 5 months straight and The Wall knocked me out for the count.
What was wrong? Was the cross member incorrect? Were the control arms out of whack? Were the top hats not located in the right spot? Many theories abounded but I realized it was time to step back for a couple of weeks and rest. Besides, maybe while I was not working on the car the problem would correct itself. Yeah, right.
A two week rest was exactly what I needed. I forgot about the front suspension problem for a while and moved on to other large projects; namely the new firewall and the frontal portion of the floor.
If you recall, I mentioned in the last article how one particular person has been working alongside throughout this project. Henry Murray has been my inspiration throughout. When building his '35 3w, he gained valuable experience that I am calling upon. Every Saturday and Sunday he comes to the club to help me work on the coupe. His insight, skill and fabricating abilities are very instrumental in how this car is coming together. His cardboard mock-up of the firewall was a perfect fit.

We welded the floor, transmission tunnel and firewall in and sat back and admired our work. Yes, everything was coming together again. Except for the front suspension.
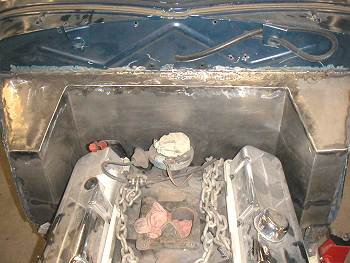
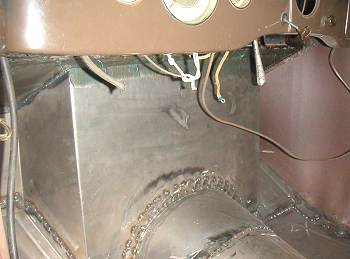
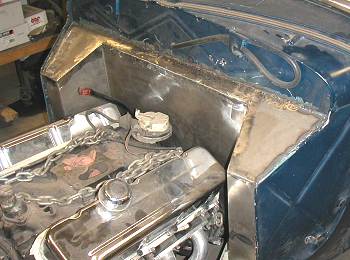
Checking and rechecking measurements of the front end revealed a disturbing fact. The cross member was tilted back almost 4 degrees. That in itself would cause the problem of the spring not seating properly. The only alternative was to trim the cross member out, level it and re-weld it back in. Sounds easy.
If you have ever tried to trim a fully-welded piece out of a car you will empathize with me. It is indeed one of the hardest, dirtiest jobs one ever has to complete. It took almost 4 hours and 5 cutting blades to trim 4 of the 5 sides welded. No matter how hard you try, it is impossible to keep the dirty remnants of this job out of your nose. Gross. I was blowing out black residue for a week!
With the ready and able assistance from Rick Norton and Henry Murray, we leveled out the cross member, tacked it in and reassembled the front end to check the spring fit. It works!! Time to tear the chassis apart, weld everything up real pretty-like and get it ready for paint! Whoop-eee!
Its now a Wednesday evening in early April, the chassis is on the rotisserie and I am applying some bondo to smooth out the edges. Usually there are a few drop-in club members in the evenings. Tonight Craig Murray, Henry Murray, Bill Tibbles and Nick Minialoff arrive. It wasn't long before Bill grabbed a piece of sand paper and was helping me scrub the chassis smooth. Then, in his usual manner, Henry said "Let's prime it tonight". He can't be serious. He was. Its now primered.
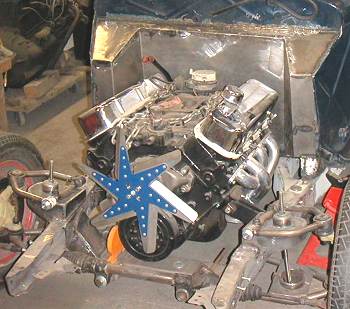
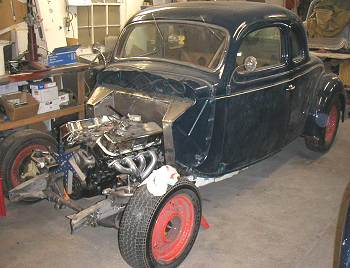
Friday of this week the coat of shiny black will be applied by Little Dougie Graham. He is a great sprayer and cool as a cucumber around toxic paint. I can't wait!
I now have 7 weeks to finish the coupe. My goal is to have it ready for the Spring Waterdown Car Show/Swap Meet on May 24/25. Just a few little projects to finish like re-assembling the chassis, installing fuel and brake lines, install a new wiring kit, hooking up the gauges, getting an exhaust system installed and a few other 'minor' details. Hope I make it…
Kookie Killer logo by Jeff Norwell